Sunday, November 30, 2008

Turkey Tonic: Green Pozole

We ate and drank too much on Thanksgiving. Friday, it was my turn to make dinner and since we had a big piece of pork shoulder in the fridge, I had a ready plan: green pozole.

Writing about green pozole was one of my first efforts as a food writer. It was never published. But that's okay, because I much prefer eating pozole than writing about it. In Mexico, a very close cousin of pozole soup--menudo, made with beef tripe--is considered the ultimate hangover remedy. So why not my green pozole with pork shoulder to sweep away that fuzzy feeling left over from the Thanksgiving binge?

Pozole, a soupy stew traditionally made with pork and hominy, may be the closest thing to a national dish of Mexico that most Americans have never heard of. On Thursday evenings in the southwestern state of Guererro, pozole vendors pop up as if on queue, and townsfolk fall into line with buckets to collect their take-out dinner. At the ubiquitous pozoleria, lighthearted diners lean over their steaming earthenware bowls, adding heaps of sliced avocados, radishes, onion and crumbled pork crackling called chicharon.

Like our own chili, pozole is made in innumerable variations. Just about every household has its own version. Folks in the west and south of Mexico prefer the green pozole made with fresh poblano peppers, tomatillos and pumpkin seeds swimming with shredded pork shoulder. Red pozole is a simpler brew of garlic and dried chiles. For “white” pozole, a red pepper sauce is served on the side, along with a platter of stewed pork shoulder and pig’s feet.

Some families insist on presenting half a pig’s head with the stew. The cooked eyeball is reserved for the honored guest.

One reason you may never have seen pozole on a menu is because pozole has never achieved the rank of restaurant fare. Even in Mexico, it is more likely consumed at a market stall or a curbside vendor. This is one of those dishes best made at home.

Americans have been trained to expect Mexican food slathered in cheese and sour cream. Pozole celebrates that other Mexican food, the more traditional cuisine that evolved thousands of years ago. The Spanish introduced domesticated meats and dairy products in the 16th century. Before that, life revolved around corn.

The ancient Mayans believed that humans were fashioned from corn gathered from a mountain and mixed with the blood of gods. The Aztecs sacrificed a maiden by way of blessing the new corn. The peyote worshipping Huichol people of the Sierra Madre continue to hold that the transcendental soul passes through a corn phase on its path to enlightenment.

Even the name of the particular corn used in Mexican pozole recalls ancient cycles, sun worship, a fecund earth: cacahuacentli.

In Mexico and to the north, natives preserved corn by drying it. They processed the dried kernels in lye or lime to remove the tough hull, or pericarp. By a fortuitous quirk of history, this caustic bath--known as nixtamalization--made the vitally important niacin within the corn available for digestion. Nixtamalization also imparts a pleasantly acrid flavor.

In this country, we call this kind of corn hominy. It is frequently ground into grits. In Mexico, the dried corn is ground to form masa, a basic dough used to make the tortillas served at nearly every meal. The Mexican hominy used in pozole—cacahuacentli--is improbably large, about the size of a nickel. After soaking the dried corn, chefs pinch off the tip of the kernel so that it opens like a crocus blossom when cooked.

Making pozole is a good way to get out and see the displays of exotic products in Latin supermarkets. Finding all of the ingredients may require a bit of initial detective work. But the final result makes a great family-style fest: Once the stew is ladled into bowls, everyone gets to pass the condiments around while they create their own meal.

For condiments, choose from the following: Sliced radishes, diced avocado, dried oregano, chopped fresh tomato, shredded lettuce or Napa cabbage, chopped red onion, chicharon--or fried pork skin--and wedges of lime. And of course warm corn tortillas on the side are mandatory.

Traditional pozole is a simple, one-pot meal. But I like to cook the different elements--the corn, the meat, the vegetables--separately, starting days in advance. The stew just gets better with re-heating. I’ve also jazzed it up with a few spices—allspice, cinnamon, clove--that might make some Mexican chefs cluck with disapproval. But I think the extra flavor is worth bending tradition.

Pozole verde (green pozole)

Serves 12

6 cups cooked or canned hominy (Juanita's is one good brand)


For the Broth:

I’ve eliminated the pig’s head, but there’s no reason to if you want to make an impression. Otherwise, the pork comes from the shoulder, a very inexpensive cut. Pig’s feet contribute gelatin for a richer broth, though they can be left out as tastes dictate. Latin markets sell them sliced into manageable pieces.

3 pounds pork shoulder

1 ½ pounds pig’s feet, cut into pieces (optional)

3 quarts (12 cups) chicken stock

½ large white onion, studded with six whole cloves

1 bay leaf

4 allspice berries, crushed

1 whole stick cinnamon

Combine ingredients in a stockpot. Bring almost to a boil, then reduce heat and simmer very gently for three hours. Remove the meat to a plate and set aside. Discard the onion. Strain the broth through cheesecloth or a fine sieve. When the pork is cool, shred it into pieces, discarding unwanted fat. Return the shredded pork to the broth. (I pick over the pig’s feet and save the edible pieces for those guests who volunteer for it. Otherwise, discard the cooked pig’s feet.)

At this point, add the hominy to the broth and refrigerate until the next step is completed.

Vegetables:

The green chilies in this recipe are fresh poblanos, the kind typically deep-fried for chilies rellenos. They are sometimes erroneously labeled as “passilla” peppers. The poblano is broad at the stem like a green bell pepper, but much darker with a purplish tinge, and narrows to a point at the opposite end. Adding to the confusion, the poblano when dried is called “ancho.”

To prepare fresh chilies, roast them over a flame on the stovetop, or under a broiler, until the skins are blistered and charred. Place them in a paper bag to steam and cool. Then remove the stems; open the chilies and discard the seeds. Remove the skin with your fingers or the dull edge of a knife.

Tomatillos appear fresh in most supermarkets. They look like small green tomatoes wrapped in papery husks, but they are actually related to the Cape Gooseberry. They should be firm and unblemished, the husk loose and easily peeled.

5 fresh poblano peppers, roasted, peeled and roughly chopped

2 medium-sized jalapeno peppers (about the size of your thumb), roasted, peeled and finely chopped

2 tablespoons lard (or canola oil)

½ large white onion, chopped

4 cloves garlic, diced

12 ounces fresh tomatillos, husks removed and chopped

2 cups broth (from that made above)

1 ½ cups hulled, raw, unsalted pumpkin seeds

Heat the oil in a large saucepan, add the onion and garlic and cook, stirring, until the onions are almost translucent, about 5 minutes. Add the chili peppers and tomatillos and cook an additional 5 minutes.

Meanwhile, toast the pumpkin seeds in an ungreased pan over high heat until golden and crispy. Place in a food processor and chop to a fine grind. Add the cooked vegetables and some broth (you may need to do this in two batches) and process until the chilies and tomatillos are minced. Add this to the pot with the remaining broth, pork and hominy. Mix well and refrigerate.

A couple of hours before serving, remove the stew from the refrigerator and heat slowly. The final ingredient is epazote (Chenopodium ambrosioides), an important cooking herb in southern and western Mexico, a medicinal tea in the north. In this country, it grows wild as a weed called “wormseed.” The pungent flavor is somewhere between green tea, oregano and dill.

2 teaspoons dried epazote, tied in cheese cloth (I now use the fresh epazote that grows wild in my yard)

Add the bundle to the stew pot while it is reheating, then discard.

Serve the stew hot in large bowls, with warm tortillas and separate bowls of condiments on the side.

Saturday, November 29, 2008

A Heritage Thanksgiving

The first year I helped our farmer friend Mike slaughter his turkeys I came home with a 40-pound bird as my reward. It barely fit in our oven and my wife has been on a tear ever since trying to reduce the size of our Thanksgiving gobbler.


This year, we implored Mike to find us a smaller bird and he replied that he could get us something closer to 12 or 14 pounds from a friend who was raising heritage breeds. But it would cost us an extra dollar a pound, he warned. We jumped at the chance.


So our turkey this year was a 12.4-pound bronze turkey. You'll notice that these heritage birds are slightly darker, the legs a little longer, the breasts a little slimmer. I liked the look of it and cooked it in the usual manner:


About four hours before the bird is supposed to go in the oven, clean it up and salt the cavity and the outside with coarse salt. Let it sit on the kitchen counter and come up to room temperature. Just before placing it in a 450-degree oven, brush it all over with extra-virgin olive oil and stuff the cavity with onion, garlic, carrots, celery, parsley and thyme. Tie the legs together but otherwise leave the cavity open.


Place the bird on a rack inside a big roasting pan along with a handful of fresh sage and a hand full of rosemary sprigs. Place the bird in the oven for 1/2 hour to brown in the high heat. Then lower the heat to 350, remove bird and flip it over in the rack. Place it back in the oven and roast another 1/2 hour, then flip it again. Continue this process for two hours. The turkey may well be done (if you have a very heavy bird, this could take up to 3 1/2 hours. But I have never had a turkey take longer than 3 1/2 hours to roast using this method.)


To test for doneness, stick an instant-read thermometer deep into the thickest part of the thigh or the wing joint, being careful to stay away from the bone. I had to use the wing joint because the thigh on the heritage turkey wasn't thick enough. It's done when it reaches 160, or a few degrees less. Place the turkey in its rack on the kitchen counter to "coast" while you make your gravy.


For the gravy, I will have been simmering all morning the turkey neck and the gizzards (except liver) in a pot with water and the usual aromatics--onion, celery, carrot, parsley, thyme. I eat the neck with a little salt. Then I put the roasting pan on the stove top and turn the heat up to moderately high. I brown the bits at the bottom of the pan (there's much less juice and fat with a heritage turkey), then pour a couple of ladles of the giblet broth, stir everything around. Turn off the heat.


Now melt about six tablespoons butter (or turkey fat) in a large sauce pan, add six tablespoons flour and make a roux, stirring frequently over moderate heat. The flour needs to cook for just a few minutes. Now you can pour in the browning juices from the roasting pan, whisking as the gravy quickly thickens, and adding giblet broth, one ladle-full at a time, whisking and whisking, until the gravy is just the thickness you like. Remember it will get even thicker after you've taken it off the stove, so I usually shoot for something a little thinner than what I would put on the table.


Finish the gravy with a splash of heavy cream, maybe some Madeira. I didn't have Madeira this year and my wife suggested I use Calvados, the French apple brandy, instead, since we were having apple tarte Tatin for dessert. That worked just fine. Season with salt and pepper to taste.


There were 13 of us for Thanksgiving dinner at my sister's new digs in McLean Virginia, including my in-laws and sister-in-law from California with her friend from India. Everyone swooned over the turkey. The heritage bird was by far the moistest, most flavorful thing we had ever tasted. It didn't need any of that brining or deep-fat frying that the food sections and magazines are all out of breath over this time of year.


Say goodbye to the Butterball. I do believe you could cook a heritage turkey almost any old way and it would still be the most delicious thing you've ever experienced.

Friday, November 28, 2008

My New Tunnel

I probably neglected to mention that when I came home from a week's vacation in August I found that something had eaten all the seedlings I had started for the fall. Romaine lettuces, cabbages, broccoli, Brussels sprouts, collards. Everything chewed down to the nub. I assume it was birds. I had left the seed trays out front where my wife had been watering them.

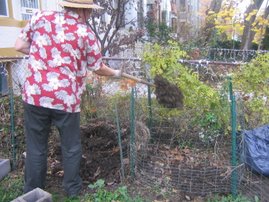
Anyway, the sudden demise of my fall seedlings put me in a funk that lasted for at least two months. I didn't do much in the garden. Didn't plant anything. Just recently I started the usual fall cleanup (late) and the new compost pile. I just assumed we wouldn't be planting anything till spring. But then I started a re-read of Eliot Coleman's Four-Season Harvest and experienced a jolt of inspiration when he described a plastic tunnel design he'd come across while traveling in France.


The genius of this French tunnel is the edges aren't buried under the soil in the usual manner, which makes getting into the tunnel very awkward if you need to plant or harvest things. Instead, the plastic is cut at the soil line and held down with a criss-crossing pattern of string over the hoops. Getting inside to plant or harvest is a breeze. You just lift up the plastic and tuck it under the string.

I had the plastic in the garage. I bought some 1/2-inch PVC tubing at the hardware store and planted the hoops. Then I drilled holes and installed these eyelets for the string. Following the illustration in Coleman's book, it still took me a while to figure out the pattern of the string. It's like lacing your shoes--a little.

Here's a detail of the string, crossing over one hoop, then attaching at the bottom of the next hoop. I'm sure I got it wrong, because my pattern ended before I got to the end of the tunnel. Maybe I didn't have enough hoops. I used cinder block to hold the ends down. I'm sure that's not right either.

In any case, according to Coleman the end of November is way too late to be planting anything. "Don't even bother," he admonishes. There's not enough sun to get the seedlings going. But I'm noticing volunteer mustard greens coming up in the other garden beds. Something down there is germinating.


So today I lifted the plastic and planted a whole array of mustards, kales, collards, spinach, arugula, lettuce, tenderleaf greens and other stuff. We'll see what happens. If they don't grow now, I'm betting we'll see them in the spring. As Coleman says, if they can grow these greens in France in winter--actually much farther north than we are--there's plenty of sunlight here for them to grow as well. It's just a matter of protecting them. Not so much from the cold as from the wind.

Minimum soil temperature for brassica germination is said to be 40 degrees, 35 for lettuce and spinach. Stay tuned....

Thursday, November 27, 2008

Wednesday, November 26, 2008

Lunch


Leftovers, consisting of "Dad's meatloaf" with mashed potatoes and collard greens.

Preparation time: 5 minutes

Shopping: none

This meatloaf, a recipe we've adopted from Tyler Florence, is now our favorite. The loaf itself consists of ground beef and ground pork with eggs, bread crumbs soaked in milk and a wicked relish made of red bell pepper, onion, tomato, ketchup and Worcesterhire sauce. Some of the relish is reserved for dressing the meat on the plate.

The loaf is shaped on a baking sheet, then topped with more of that relish and strips of Black Forest bacon. It's smokey delicious.

The collards were cooked in a smoked turkey neck broth and seasoned at the table with cider vinegar. I can hardly imagine a more decadent lunch.

Tuesday, November 25, 2008

Unhealthiest City in America

According to the Associated Press, that honor would go to Huntington, West Virginia. There, the dining experience is ruled by hot dogs. Huntington leads the nation in heart disease and diabetes--as well as the number of elderly people who have lost all their teeth.

"A lot of the patients we were seeing were getting heart attacks in their 30s. They were requiring open heart surgery in their 30s. And we were concerned because it used to be you wouldn't see heart patients come in until they were in their 50s," said a nurse at the regional heart institute in Huntington.

Located in coal country near the Ohio River, Huntington is on the skids economically. People live on fast food. In fact, Kentucky Fried Chicken recently issued a challenge: see if you can spend $10 in a local supermarket and come up with a meal to beat the KFC 7-piece $9.99 "value meal."

There's a pizza joint on nearly every block in Huntington and it's rare to see a jogger or bicyclist on the streets. Said one local physician: "I don't know that I've ever been in a place where I've seen so many overweight people."

Read the whole story here.

Monday, November 24, 2008

Hard-Boiling Old Eggs

Even farmers advise letting eggs eggs grow old before trying to hard-boil them.

The reason is, as eggs get old they deteriorate. The egg's attachment to the inside of the shell grows weaker, making it easier to peel when hard-boiled. The membrane that holds the yolk in the center of the white also breaks down, which is why yolks sometimes end up in the strangest places when you hard-boil eggs.

However, there is a method for cooking new eggs that solves the peeling problem. And wouldn't you rather have a fresh egg in your salade Nicoise?

As it happens, I am cooking a dozen old eggs that we found one day on our doorstep. We still don't know who is leaving us eggs. But since they were beyond the "use by" date, I'm hard-boiling them.

The trick is to move the eggs back and forth bettween boiling water and ice water. This causes expansion and contraction between the shell and the egg inside, making peeling a breeze. The method is described in detail in Julia Child's The Way to Cook.

For a dozen eggs, place the eggs in the bottom of a tall stock pot and cover with 3 1/2 quarts of cold water. Over high heat, bring the water to a boil and immediately remove the pot from the heat. Cover the pot and let it sit for 17 minutes. Remove the eggs with a slotted spoon and transfer them to a large bowl of ice water.

While the eggs are sitting in the ice water, put the stock pot back on high heat and bring the water back to a boil. When it is boiling, transfer the eggs back to the pot for 10 seconds. Then move them back to the ice water.

When the eggs have cooled, you can crack the shells and peel them. The eggs should be perfectly cooked (none of that grey ring around the yolk) and easily peeled. Deviled eggs never looked better.