Showing posts with label spring. Show all posts

Tuesday, April 7, 2009

Look What's Coming Out of the Ground


Excuse me while I gush over my fava beans. They are one of the first plants to emerge in the spring and they also happen to be one of the most interesting. As they grow, favas assume an architectural yet almost prehistoric looking structure. You would hardly know they were a bean. Yet these are the original beans of the Old World, the so-called broad bean. We love to smash them with peas and Romano cheese and smear them on bruschetta.

The peas are coming up. There's a long row of them in a bed where I plan to plant mostly beans this year. As they get taller, I will drive wooden stakes into the ground and tie string to give the peas something to hang on to with their little tendrils.

The leaf lettuces have all germinated, along with the radishes and all of our brassica greens: arugula, mizuna, tat soi and mustard. We are seeing the first signs of the new Swiss Chard as well as beets. Carrots take long time to germinate and we are still waiting to see the parsnips and burdock emerge.

Some weeks ago I planted seed trays with four heirloom varieties of tomatoes: Cherokee Purple, Mortgage Lifter, Dr. Carolyn (a golden cherry tomato) and Roma. They've already been moved into larger pots and are towering over the bell peppers and eggplants. We have a few broccoli plants and kohlrabi, as well as many little parsley, cilantro, dill and chervil. They will be strategically placed in the garden so that we have a steady supply of fresh herbs. The cilantro will bolt quickly, of course. That's one herb that doesn't take very well to our hot summers here in the District of Columbia and needs to be planted repeatedly.

And for the first time we've planted onions from seeds. In the past, we always started our onions from small sets, but they never seemed to get very large. Every day lately I've been carrying the trays of onion plants outside for sun, but it's been a cool and often dreary spring this year. (Great for the spinach, another favorite that's quick to bolt in the heat.) We've seen frequent rain and wind. We should be transplanting the onions soon.

This is one of those traditional times when the garden isn't yielding much in the way of ingredients for our kitchen. But there is great hope and lots to keep an eye on. Meanwhile, we are still eating last year's pickles.

Wednesday, April 1, 2009

A Peach of a Spring

The little peach tree we planted last year at my daughter's charter school is beginning to bloom. Exquisite.

Tuesday, March 10, 2009

Mulching Garlic

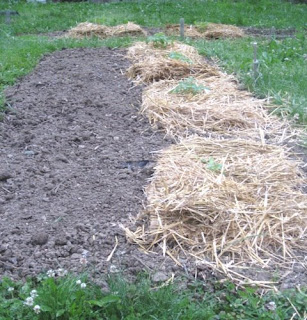
I like to mulch with straw. Straw gives the garden a natty look, like the gardener really knows what he's doing. Ha! And really I should have mulched my garlic beds when I planted them last fall. But I haven't been particularly thrilled with straw mulch around garlic. It seems like the weeds always manage to find a place to grow through the straw. So this year looking at the same issue again I thought I'd try to make the straw thicker by chopping it up. This has the added advantage of making the mulch easier to lay around the garlic leaves--if you waited until spring to mulch as I did.

Here's my chopper: the trusty leaf pulverizer. It's really just a weed whacker (line trimmer) in a can, a small motor turning two lengths of plastic line at great speed. Like a food processor, you just drop your vegetable matter--usually leaves in the fall, straw at the moment--from the top. The Whirring plastic line chops it to pieces and it all falls conveniently into the trash can underneath. I always seem to have at least one pile of rotting straw somewhere in the garden, usually last year's mulch.

The trash can practically carries itself to the garlic bed, where I spend an hour or so arranging the chopped straw around the plants, about two inches thick. I like the idea of foraging for mulch on site, rather than buying something in a plastic bag from the garden center. In the past I tried mixing chopped leaves and shredded newspaper together for mulch. But the newspaper liked to blow around too much in the wind. Now I'm thinking the straw could easily be stretched by mixing in some of the shredded leaves I've been saving from last fall. The first job of mulch is to hold moisture in the soil. But it also does a good job of suppressing weeds, and garlic doesn't care much for weeds.

How do you like to mulch your garlic?

Monday, March 9, 2009

Family Gardening

I spent most of my Sunday taking advantage of spring-like weather to work in the garden--preparing beds, mulching and planting seeds. Apparently I gave the impression that this was so much fun that daughter, home from a long bike ride with Mom, came running over to join me. "Where I can I plant my garden, Dad?" she wanted to know.

I sent her inside to fetch the seed packets and she carefully searched through the flowers and decided she would plant Sweet William. So we marked off an area in the soon-to-be bean bed and she did all the work herself--reading the instructions on the seed pack, fluffing the soil, making little holes and planting the seeds. Here she is smoothing everything over. She then ran off to fill the watering can.

Only fellow parents will fully appreciate what a turnaround this is for a child who normally would be impossible to dislodge from her seat in front of the computer. Is this just spring fever? Or could it be we have a junior gardener in the family? Dad would be ever so grateful for an extra pair of hands.

Sunday, March 8, 2009

Winter's Revenge

Leigh Hauter said he never saw it coming.

"I didn't realize it was getting that cold," he said of the afternoon the Big Freeze descended. "We went for a walk and the water in the boiler was already frozen."

The wood-fired boiler in question is the one that heats farmer Hauter's greenhouse and his thousands of new seedlings. They represent nothing less than his spring crops for the coming CSA season. If he couldn't somehow get his frozen boiler working again in the face of a near-record March cold snap, he was looking at thousands of dollars in damage.

Leigh rose early the next morning and got to work trying to feed fresh water to the boiler. That meant hauling many hundreds of feet of fresh plastic pipe up Bull Run Mountain to the artesian well that supplies his water. The old 1 1/4"-inch water pipe was not only frozen solid after a night of temperatures dipping into single digits, it had burst open in several places.

Soon Leigh's water-soaked gloves were frozen as well, then his hands as he struggled into the second day to replace the pipes. A blast of wind ripped off his hat and made his work seem all the more desperate. Meanwhile, thousands of trays of seedlings inside the greenhouse were beginning to feel the effects. The potting soil was freezing. The seedlings were wilting.

After two days of this, the return of winter--in the form of a nasty cold front that had dumped snow from Birmingham in the deep south all the way to Boston--finally moved out to sea and Leigh surveyed the damage. He called a nursery in Indiana and placed an order for replacement seedlings that set him back at least $2,000.

But look here. As the greenhouse thawed again, there were signs of life where none could rightly be expected. Tiny seedlings, barely an inch tall, had managed to survive even when the soil they were rooted it had frozen stiff. "It's amazing, isn't it?" said Leigh as he reached down to inspect his little broccoli plants. "The sorrel wasn't affected at all," he says, pointing to plastic trays where hundreds of sprouts are growing.

So it is back to getting ready for a new year at Bull Run Farm outside The Plains, Virginia. Leigh continues to plant and water his seed trays. Meanwhile, his CSA subscribers are ready for a new season as well. Sunday was an open house wherein subscribers were invited out to the farm for tours and to collect their own eggs. Leigh has two busy chicken tractors in the fields. At one, the chicks that arrived last October just a day old are now full-grown and have started laying eggs.

Around the other tractor, the chickens mingle with geese strutting and honking around the enclosure, as well as several heritage turkeys that have formed a gobbling chorus. Leigh uses the geese to perform weeding chores on the farm. But apparently they also like to eat chicken eggs, so Leigh has the nesting area covered with a tarp. He pulls back the tarp and we collect a dozen eggs, all laid within the last couple of hours and still warm.

Leigh had expected a few visitors but instead several dozen subscribers showed up. He'd been giving tours all morning. I wondered if our current economic hard times had not discouraged CSA subscriptions and Leigh calculated that out of about 500 subscribers, a dozen or so had recently "come up with excuses to back out." But wife Wenonah said others are joining, and not because they are fanatic about local food but because "they just don't trust the food at the supermarket anymore and they heard about us."

The Hauters were a bit aggravated when the visitors drove their vehicles over newly planted rye crops. The rye is a cover to provide fertility for fields where Leigh plans to plant vegetables in June. It looks just like grass, which it is. On a sloping area outside the greenhouse Leigh's field of garlic is several inches tall, the little plants raising their heads above a thick mulch of hay.

Bull Run Farm is set back in a narrow, thickly forested valley. It's hard to imagine how Leigh and Wenonah grow crops on the mountainside. But as you walk about, you see clearings here and there where a plastic-covered hoop house abuts a field, indicating an area that soon will be planted with broccoli and Chinese cabbage and sorrel.

This day temperatures would climb over 70 degrees. The last blast of winter was already fading into memory.

Sunday, March 1, 2009

How the Farmer Plants His Seeds

Imagine trying to get 10,000 tiny seeds from seed packets into these growing trays. Now imagine 70,000 seeds.

That's what Leigh Hauter has been working on the past week--getting a jump start on the crops for his CSA at Bull Run Farm. So far, Leigh and his helper have 20,000 seeds planted and the broccoli and cabbages are sprouting. Now just 50,000 more seeds to go.

I get dizzy thinking about planting just a few hundred seeds. That's because I use my fingers. Fortunately for modern farmers, there are some mechanical aides to make the process a bit easier. But let's not jump too far ahead.

Seed starting for Leigh Hauter actually begins in January when an 18-wheel truck arrives with pallet-loads of organic potting medium. The road to the farm wasn't designed for an 18-wheeler, so the bags are dropped at the end of the driveway. Leigh has to load them into his pickup truck and deliver them the rest of the way to the greenhouse.

Waiting at the greenhouse are many hundreds of plastic seed trays in which the new year's seeds will sprout and grow until the last frost date passes and they can be transplanted into the fields. Some growers forgo manufactured seed trays and make their own "soil blocks" in which to sprout seeds. But Leigh says he usually gets several years' service out of a plastic tray. He orders about 200 new ones each year to replace the ones that wore out or were "mishandled" the previous year, meaning run over by the tractor.

Leigh's strategy is to give his seedlings ample room to grow in the trays, so he chooses trays with 50 cells. Other trays have 72 or even more cells, because the cells are much smaller. He also likes to add some fertilizer to his growing mix--a little compost, a little bone meal, some kelp. "I know some growers like to transplant their seedlings into bigger pots and fertilize them at that time," Leigh said. "But that would be too much work for us. I could not see us doing that. So having a little bit of fertilizer in there now saves us work."

Leigh and his helper pour the starting mix into the trays in assembly-line fashion, then tamp it down with plaster molds that match the shape of the seed cells. Now comes the fun part: getting one seed into each cell. Leigh's helper is stubborn. He still uses a simple manual seeder that drops one seed at a time into the cells. But Leigh has graduated to a vacuum device that delivers five seeds at a time. It has different-sized nozzles depending on the size of the seeds being planted. Some growers use similar vacuum machines that can plant an entire tray, each seed placed precisely in the middle of its cell. But these cost thousands of dollars. Leigh is content to deploy his own time and labor instead.

Once the seeds are placed in their cells, more growing medium is poured over them and tamped down. At this point they are watered. There's a hose with a watering wand that hangs from above in the greenhouse. Until they sprout, the seeds may only need to be watered every two or three days. But once they turn into little plants with leaves and root structures, they will need to be watered as much as two or three times daily. In the past, extra hoses and sprinklers made watering easier. But Leigh said the greenhouse was moved from another location and the more elaborate watering system fell by the wayside.

Planting and watering all day in the greenhouse doesn't exactly fire the farmer's imagination. But Leigh says it's pleasant enough work. "Better than being outside in the cold shoveling snow or something." With its wood-fired boiler, the greenhouse stays toasty. Last week when temperatures climbed to 60 degrees outside, Leigh had to roll up the sides of the greenhouse. "It would have been 110 degrees in there."

I was curious where Leigh buys his seed. In my own case, I've narrowed seed purchases to a few distributors: Southern Exposure Seed Exchange, located in Virginia; Johnny's Seeds in Maine; Heirloom Seeds in Pennsylvania. I like the idea of buying seeds from people in our area who work organically and focus on open-pollinated heirloom varieties. Leigh says he also buys some seed from Southern Exposure and from Johnny's, but his favorite seed company at the moment is E&R Seeds in Munroe, Indiana (sorry, they don't have a website). "Johnny's seeds are very reliable and they've got a great catalogue, but they've gotten expensive," Leigh says.

So for now at Bull Run Farm it's fill trays, plant seeds and water. And don't forget to keep the fire in the greenhouse boiler burning. "Yesterday we were out cutting firewood," said Leigh. "We've got about 100 acres of woods and lots of trees the gypsy moths killed a couple of years ago." What the gypsy moths killed will soon be heating water that runs in copper tubes under all those seed trays. Peppers and tomatoes can't be far behind.

This is the second in a continuing series of articles about Leigh Hauter and the methods he uses he grow remarkable organic produce at his farm in The Plains, Virginia.

Saturday, February 21, 2009

A New Season on the Farm

This is the first in what we hope will be a regular series of articles about Leigh Hauter and his CSA operation at Bull Run Farm in The Plains, Virginia. Leigh has been farming in the Washington area for 15 years, first at the Cheseapeake Bay Foundation's Clagett Farm in Prince George's County. He was involved in early efforts to bring a farmers market to underserved residents of the District of Columbia east of the Anacostia River. Leigh now has about 500 subscribers to his CSA. His wife Wenonah is executive director of the advocacy group Food and Water Watch.

Signs of life are beginning to appear on the farm. For Leigh Hauter, that means ramping up the heating system in his greenhouse--fixing leaky pipes, lighting the furnace and planting seeds.

A constant temperature of at least 70 degrees is necessary to prompt germination in thousands of pepper and eggplant seeds. Leigh has a fairly new, high-efficiency furnace fired by the wood that grows on the farm. The system runs hot water--90 to 100 degrees--through copper pipes under his seed trays, giving the seeds a nice warm bed in which to sprout and keeping the greenhouse toasty when nighttime temperatures dip.

Leigh is aiming for a last frost date of April 15, so he's planting things now that typically require at least eight weeks in seed trays before they can be safely transplanted outdoors. That means peppers and eggplants by the thousands. He's planted at least eight different varieties of bell peppers--red, orange, purple, white among them--and more hot peppers than he can count. That will mean plenty of visual interest when subscribers open their CSA boxes later in the year.

Leigh is also starting to plant tomatoes. He hopes to be shipping two varieties of cherry tomatoes--Early Girl and Siberian--as early as the middle of June. This is also onion planting time, but Leigh does not plant his own onions. He purchases thousands of plants in bunches from a firm in Indiana. They'll be planted in the ground later.

Also at this time Leigh is planting broccoli. His customers like broccoli and unlike some other brassicas, such as cauliflower, broccoli will withstand a bit of frost. He's planning four successive crops, aiming for 1,000 plants in each spaced one week apart.

Leigh used to start his CSA deliveries in May, but at that time of the year the crops available for harvest are mostly greens. "People don't like six weeks of greens," he said, "so I'm giving them three weeks." Asked if he wasn't including spinach among his early crops, Leigh said, "I have a hard time finding spinach that doesn't bolt in this season." We have the same problem with bolting spinach. Spring in Washington gets too hot too fast.

Leigh Hauter is a former English teacher whose introduction to the farm was keeping bees at the urging of his father-in-law. Leigh sold the honey at farmers markets and has since managed to make farming a full-time occupation. We'll be checking in on him on a weekly basis so that kitchen gardeners in our area can see how a professional grows beautiful, bountiful produce.

The above photo is of the greenhouse seed starting operation at One Straw Farm in Baltimore County, taken last July.

Saturday, February 14, 2009

February Harvest

Carrots have stored very nicely in the ground. And since we've been experiencing a bit of a thaw the last week I went out and started preparing beds for planting. While I was digging around, I pulled up this lovely bunch, about five pounds worth.

We've been pulling occasional parsnips through the winter. These were planted last spring and were starting to show new growth on top. Time to pull them before they get too tough to eat.

Lots of beets as well. Some will go into our favorite beet salad with red onion and red wine vinegar. The rest we'll try to store. But not to worry. No chance they'll go bad. We love beets too much.

Tuesday, June 17, 2008

Shelling Favas

The fava bean is the original Old Wold bean. Other beans originated in the Americas. Picked when the pods are green and plump, the barely mature beans are sweat and tender, tasting like fresh peas. But getting them from the garden to the dinner plate takes a bit of work.

The fava bean is doubly protected--first in a very large pod with a pillowy lining, then inside a fairly tough casing.
To extract the bean from the casing, blanch the beans in a large pot of boiling water for 30 seconds. Transfer the beans to a bowl of cold water to arrest the cooking process. This can be done in batches. Allow the water to come back to a boil before proceeding with the next batch.


On one end of the casing you'll notice a very dark indent. This represents the fava's belly button.


The other end is smooth, with an airfoil shape.
To open the casing, use the tip of a paring knife to make a crescent-shaped incision along the smooth end.
Gently squeeze between thumb and forefinger at the opposite end. The bean should slide out. Older beans are more difficult to remove--another reason to pick the favas at their peak, when the pods are plump and bright green. A dull or browning pod indicates advanced age.


Free of its casing, the fava is ready to finish cooking any way you'd like.


This bowlful of blanched and shelled favas represents our entire harvest from 50 plants. I'm thinking lightly sauteed with onion and a little butter. Or maybe smeared on bruschetta with pecorino cheese....

Wednesday, June 11, 2008

Shelling Peas

Here's a great leisure activity. Don't we all yearn for a lazy afternoon with nothing more important to do than shell peas? Even daughter got into the act, learning how to use the point of a paring knife to neatly split the pod in two. You can do the same thing with your fingernails--if you have long fingernails. I prefer the knife.

The best peas are still sweet, meaning before the pod begins to turn from deep green to a dirty yellow. As the pod changes color, it becomes papery and more easily opened to reveal the peas. But by that time the peas have begun to toughen and turn their sugar into starch, preparing to become next season's seeds.

This is an English variety of shelling pea--Wando. The pods are inedible. Pick them when they're plump and green.


At this point the peas are plump and flavorful, practically bursting from their pods. It's a gratifying feeling, opening pods of peas like this knowing they were grown right in front of our house in the District of Columbia, about a mile from the White House.

Ours is not a perfect climate for English peas. Spring gets hot and humid early around here, and that's when fungi start attacking the pea plants.


Last night we had our peas again with pasta and cream sauce. That's the last of that, says the wife. Too much fat in the cream to eat on a regular basis. Our only disappointment is that we don't have more peas. I could easily live with a garden full of peas. We could pick them all day and freeze them for later.

We'll just have to plant a bigger crop in the fall.

Saturday, June 7, 2008

Heat Wave Breakfast

Leftover quinoa pilaf with peas, fava beans and edamame, plus leftover chicken casserole with carrots in peas.

It's peas squared!

Preparation time: 5 minutes

Shopping: None

Just the thing to heat in the microwave after spending the very early part of the morning harvesting the rest of our peas, removing the pea plants and getting the vegetable bed ready for bush beans and climbing lima beans. It's forecast to be near 100 degrees here in the District of Columbia for the next several days. But with the humidity it will feel like 110.

Oh, we are pining for those cool, wet days of April and May. Seems like we have skipped right into August.

Stay cool, everyone. Be sure to wear a hat and sunblock if you must be outside. Otherwise, do your gardening at first light, before things heat up.

Monday, June 2, 2008

Favas

It seemed that for the longest time we were admiring the flowers on our fava plants. Then one day we looked and where the flowers had been, pods were growing. Now the pods are swelling and seem to be getting longer every day. They are already the size of overstuffed green beans--about five inches long--but they aren't even close to harvesting. No, these pods will get much, much bigger before they are through.

I am totally enamored of our favas. They don't get much of a mention in the vegetable literature, but they are quite a plant. The growth is incredibly vigorous, producing plants upwards of 36 inches tall with a profusion of pointy, grayish-green leaves. The mature plants have a pleasingly complex, architectural quality that makes them a standout in the garden.

Favas don't like the heat. I planted an entire seed pack--50 seeds--in a small patch on March 4. I suppose I could have planted them earlier. I worry that as temperatures climb into the 80s here in the District of Columbia the plants will poop out on me. But so far they are soldiering on with no sign of stress or disease. And the production of fruit is impressive--there are pods everywhere you look.

This is what the baby favas look like this morning. They have a pillowy nest inside their pods. As they mature, they will develop a tough casing around the fruit. At this stage, they can be eaten, but I don't recommend it. The little ones don't have the sweetness of mature favas and leave and astringent bitterness on the tongue.

Favas are so easy to grow and so productive. If you have trouble growing peas in our area, try favas.

Thursday, May 29, 2008

Peas with Pasta and Cream

If you have any concerns about your arteries or your waistline, you should probably avert your eyes. This is one of those dishes that can't be made any other way except with the best cream you can find and plenty of pecorino cheese.

That's the excuse I give myself when I want to make a meal out of the peas we've just harvested in the garden. The peas love to nestle in pasta shells such as these large elbows, or chiocciole. Rottini pasta would work as well.

Preparation is simple. Sweat 1/4 onion, diced small, in a heavy saute pan or skillet with olive oil. Season the onion with salt to draw out the liquid. When the onions are soft, after about 8 minutes, pour in 1 cup heavy cream, in this case the deliciously thick cream we get delivered from South Mountain Creamery. When the cream starts to bubble, lower the heat so that the cream continues to simmer.

Meanwhile, bring a pot of salted water to a boil and add 1/2-pound pasta. While the pasta is cooking, the cream should thicken to a sauce-like consistency. Add 2/3-cup shelled peas to the sauce and cook just a minute or so, until the peas are softened to your taste. Season with a pinch of salt.

When the pasta is al dente, remove it from the pot, drain it well and toss it into the skillet with the cream sauce and peas. Stir in a liberal grating of pecorino cheese. Serve immediately in warm, shallow bowls.

Wednesday, May 28, 2008

Peas

Anybody who says frozen peas are as good as fresh is kidding themselves. We like to think it's true, because getting fresh peas isn't easy. But really, there's nothing to compare with peas right off the vine. My wife prefers them just like this--raw, uncooked. I see them tossed just a few seconds in a saute pan with some butter and a little salt. Our friend Shelley is wild for fresh peas. She tosses them in her salad.

We've had our best crop of peas this year. Some plants are loaded with pods. I planted them in a long row in the rear of a 14-foot-long bed, then drove three wooden stakes into the ground and strung twine between the stakes for the peas to climb on. As the peas grew taller, I added another rung of twine. Sometimes they needed a little help finding the string and I'd give them a nudge in the right direction.

Still, it's not enough. The freshly harvested peas look pretty at the bottom of a mixing bowl. But we want more. Not all the plants grew so tall and healthy. I'm not sure why. I did not do anything to the soil when I planted the peas. Maybe they'd like a little compost. Next year we'll just have to plant more. Or perhaps a fall crop?

Tuesday, May 27, 2008

I'll Take Those Three Ibuprofins

Whoever said gardening was easy?

It might not be immediately obvious, but getting our front-yard kitchen garden to look like this took the better part of the Memorial Day weekend. By the end of it, we were grilling burgers and hot dogs and sipping our gin-and-tonics, but I was bushed.

First, I harvested about 10 pounds of various mustard greens and turnip greens and Chinese greens from this bed, blanched the greens and packed them for freezing. Then I applied my usual cultivation approach to the bed--working my forked spade all around to loosen the soil, breaking up the surface with my stirrup hoe, stirring in some compost.

We are transitioning to summer. The bed is now planted with two varieties of pickling cucumbers to grow up trellises on the right, Italian marrow squash in the middle, and three types of radishes in two rows on the left.

The larger part of this bed has been lying fallow for the longest time while the onions, inter-planted with radishes on the right, grow tall. But it was finally time to transplant the tomatoes. Here we have Cherokee Purple, Dr. Carolyn and Big Boy, all comfy in their thick layer of straw mulch.


I had planted Tokyo Bekana greens, dill, arugula and lettuce behind the rhubarb, figuring they would tolerate a little shade. Well, I sort of miscalculated how fast and large the rhubarb would grow. It's very happy in its compost-amended bed. So the other plants never did much except go to seed. But I needed to clear them out of the way to prepare the soil and plant okra. (See yesterday's post.)


This bed was the scene of last year's arugula going to seed. I collected quite a load of seed pods. I'm hoping daughter will help me pick through them to collect the seeds. Then more time spent with the forked spade, the stirrup hoe and hauling buckets of compost from the compost pile before planting more tomatoes: Mortgage Lifter and Green Zebra.

I give the individual tomato plants plenty of room to breathe. They're spaced four feet apart. At the next opportunity, I'll install cages made of concrete reinforcing wire. I plan to plant some zinnias in front of the tomatoes--we always like to have some flowers in the garden--and our collection of peppers and Asian eggplant.

Visible in the far rear is the last bed I renovated for the summer. It's now planted with two Roma tomatoes and a large section of sweet potatoes. This is our first year growing sweet potatoes and I'm anxious to see how they perform in this particular bed. It's situated on the north side of the house, but in summer gets sun in the morning and late afternoon.

Yikes...just writing about all this work makes me hungry for another Ibuprofin.

Saturday, May 24, 2008

Tomatoes in Trenches

A combination of factors resulted in lanky tomato plants this year. It's hard to provide enough sun for the young plants through a window. Ours is east-facing, so they get a blast of sunlight in the morning, then reflected light for part of the afternoon.

This year, though, the weather has been unusually cool and rainy, so the plants have spent more time indoors. Straining to get more sun, they grow taller and spindlier. Now that planting time has finally arrived, I've decided to try a different technique for transplanting them into the garden. Instead of digging a deeper hole to accommodate the taller tomato plants, I'll be planting them in trenches.


I dig a hole about 18 inches long and 8 inches deep. I've placed a plant, still in its pot, inside the hole to give an idea of scale.

Next, add plenty of compost to the trench. The idea is to create a kind of earthen ramp inside the hole, where it's plenty deep at one end to hold the root ball, then grows increasingly shallower toward the leafy end of the plant.

Lay the tomato plant inside the trench so that the topmost leaves have several inches of clearance from the soil surface. Tomatoes have the admirable ability to form roots all along their stems. Covering most of the stem with soil will result in lots of roots.


Cover the length of the plant with a mix of soil and compost, carefully bending the leafy end up and clear of the trench. Tamp the soil down around the plant to eliminate any air pockets. Soak the area with water.

The final step is to mulch around the tomato plant. I like straw. I like the natty look of straw in the garden. I like the fresh farm aroma. This year I'm trying the mulching method Charles H. Wilber describes in his book, How to Grow World Record Tomatoes. Wilber holds the Guiness record for tomato production relying on compost, lots of space between his tomato plants and straw mulch. He's grown plants almost 30 feet high.

Wilber cuts blocks from straw bales and lays them tight one against the other around the tomato plants. A thick layer of mulch holds moisture in the soil and suppresses weeds. Wilber recommends partially rotted straw to help feed the tomatoes.

I don't have any partially rotted bales of straw on hand. I bought two new bales from the farm supply on a trip to Annapolis. I used my fork spade to cut blocks about two inches thick from the end of a bale, and arranged the blocks around the plants in a square. The straw blocks make a tidy garden bed, and the only thing left to do is install the cages I made last year from concrete reinforcing wire.

Friday, May 23, 2008

Freezing Greens

The truth is, we almost always have more food growing in the garden than we can possibly eat at any one time. This is especially true as the temperatures grow warmer. All at once, our pretty little greens--the mustards and Chinese greens especially that we planted back in March--start to grow very tall and begin blooming.

Greens going to seed make a nice display, but it's a bit frustrating because we know the leaves that we had planned on eating will soon be inedible. The trick, I think, is finding a way to preserve the greens, so this year I've been spending my free moments sitting in the garden plucking tat soi plants and mustard green plants individually out of the ground and stripping them of their leaves and preparing them for freezing.

I don't mind this job at all. You sit on your butt and pull slender plants out of the soil and think about nothing in particular. It's another of those meditative acts in the garden that takes you away from your troubles, like composting or counting the holes in ceiling tiles.

The process is fairly simple. Once you've collected a heap of greens, put a pot of water on the stove to boil. Clean the greens thoroughly in the sink, then blanch them for two minutes in boiling water. Remove the greens from the pot and chill them in cold water. Let them sit in a colander a while to drain completely. Now you can pack the blanched greens in freezer bags and store them in the freezer for use later.

I envision these greens being braised at some point with onions and a little vinegar, maybe even some bacon. They could also be used as an ingredient in an egg dish, such as frittata, or in a soup or stew.

The best part about being able to store these greens is relieving some of the guilt I always feel over planting too many.

Monday, May 19, 2008

Peas & Beans: Progress Report

Our row of pea plants has come up lush and strong with many pods that are just beginning to swell. Capturing the image with a camera is not so easy. Perhaps you can make out one of the pods just to the left of center.

The fava beans made a dense patch of tall and incredibly architectural foliage. This being our first year planting favas, I had no idea. They produce many clusters of white flowers shaped almost like butterflies with their wings folded. To enhance the effect, each flower has a big black spot on it, like an eyeball.

The cranberry beans seam to be happy, even though spring in the District of Columbia this year has been cooler and wetter than usual. These are planted in the aborted spinach bed. We don't let our vegetable beds sit vacant for long, just add some more compost and away we go with the next crop.