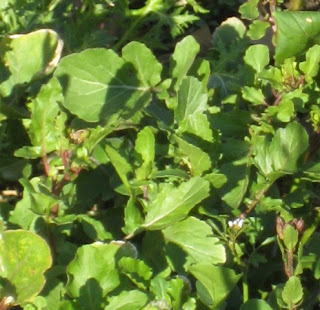
Showing posts with label greens. Show all posts

Saturday, March 7, 2009

Breakfast


Poached eggs with fresh sausage patty and braised greens.

Preparation time: 10 minutes

Shopping: None

A high-protein, low-carb breakfast for me means two eggs. I prefer them poached to avoid the greasy cleanup from fried eggs. As you can see, I also like my yolks runny.

In the past, I used toast to sop up the yolks and I was mighty frustrated for a time chasing the yolk around the plate without that handy piece of browned bread. Then it occurred to me to add some greens from our own garden to the plate. They do an excellent job of mopping up all that delicious yellowness, so full of beneficial omega-3 fatty acids as they come from eggs laid by hens that forage outdoors on a local farm.

My method of poaching eggs is to heat water in an iron skillet, season with white vinegar and bring to a strong simmer. I crack the eggs and release them gently into the water. Fresh eggs will hold together very well. (Old eggs tend to break apart--not good for poaching, better for hard-boiling.) After a few minutes, I remove the eggs with a slotted spoon. You can pat them dry with a paper towel--or not.

The greens were harvested last year and blanched before being frozen. After defrosting, I simply cook them in salted water until tender, then dress them with a bit of vinegar. Two years ago we helped slaughter pigs on our friend Brett's farm and came away with many pounds of sausage and sausage meat. The meat had been at the bottom of the freezer. We made several different kinds of sausage that year and I'm not sure which this is. I neglected to label it. A sandwich-size package made six patties that I baked off in the oven and have been eating over the last week.

This is the kind of breakfast that gets me out of bed in the morning.

Monday, February 23, 2009

Prize Worthy Sweet Potato Galette


How did the North Carolina Sweet Potato Commission know we are growing our own sweet potatoes?

I just received an e-mail urging me to enter a "bloggers recipe contest" sponsored by the sweet potato commission. I might have blown it off, but the reward for best recipe is $1,000. That got me thinking maybe I should post one of our favorite methods for putting sweet potatoes on the dinner table--this sweet potato galette.

A potato galette in the French country style traditionally is made with standard potatoes. But we love sweet potatoes--they are so nutritious and full of flavor--and now we harvest them out of our own kitchen garden, right here in the District of Columbia about a mile from the White House. One day I was trying to think of a way to incorporate sweet potatoes with something else we grow plenty of: greens. And to continue the local theme, I decided to add one of our favorite Maryland cheeses. Why not layer them all together? The sweet potato galette was born.
To make the galette, preheat your oven to 350 degrees.


Coat the bottom of a well-seasoned, cast-iron skillet with extra virgin olive oil and place it over moderate heat. Peel three large sweet potatoes and slice them into thin rounds. (A mandoline makes quick work of this.) Shingle the rounds to cover the bottom of the skillet. The bottom-most potatoes will begin to cook and brown while you are assembling the rest. Between each layer, dot the potatoes with cooked greens, such as mustard greens or kale or collard greens. Or, better yet, a combination of greens. You will need about one pound of cooked greens total.


Alternate layers of cheese. I've used a soft Gorgonzola in the past. But for a strictly local galette, I bought a piece of blue goat's milk cheese from Firefly Farms in Bittinger, MD. Firefly is one of the regular vendors at the Dupont Circle market. Between each layer, after you've capped it off with more potatoes, press down very firmly with a flat object, such as a pot lid or another skillet. Then season with olive oil, salt and black pepper.

Continue layering the galette until the skillet is nearly filled to the top. Place in the oven and bake until the potatoes are easily pierced with a metal trussing skewer, about 20 minutes. Remove the skillet and allow the galette to cool. To remove the galette from the skillet, use a knife or spatula to cut around the edge, then invert it onto a large plate or cutting board.


This galette is delicious warm or even at room temperature, and it can easily be made ahead and reheated. The sweetness of the potatoes seems to meld exceptionally well with the pungency of the cheese and the pleasant bitterness of the greens. Try it with your favorite local salad and a crisp glass of Chablis. Or if you've got a particular hankering for meat, this galette would be an ideal partner for a juicy pork roast.

Friday, December 12, 2008

Germination!

Things are starting to happen under our winter tunnel. The seeds I planted back on Nov. 26 are starting to turn into little plants. Here are the tiny mizuna seedlings, looking much larger than real life once enlarged in the photo editing process.


And here is the arugula, always a pretty reliable germinator. I checked the length of the bed and also found mustards, spinach, collards, kale and lettuce sprouting. Now the question is whether these little plants can survive the deepest part of winter. The days will soon be getting longer, but the temperatures will probably get colder. Lately we've been seeing a range from the mid-20s into the 50s. We really should have planted these seeds in September. Had we done so, we could be harvesting by now.

I'm impressed by the job our Canon Elph camera does with such small subjects. The sharpness of image is there even when blown up several times. Tiny pebbles look like massive boulders.

Friday, November 28, 2008

My New Tunnel

I probably neglected to mention that when I came home from a week's vacation in August I found that something had eaten all the seedlings I had started for the fall. Romaine lettuces, cabbages, broccoli, Brussels sprouts, collards. Everything chewed down to the nub. I assume it was birds. I had left the seed trays out front where my wife had been watering them.

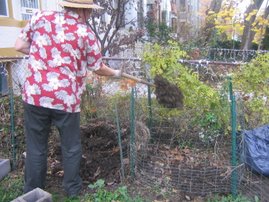
Anyway, the sudden demise of my fall seedlings put me in a funk that lasted for at least two months. I didn't do much in the garden. Didn't plant anything. Just recently I started the usual fall cleanup (late) and the new compost pile. I just assumed we wouldn't be planting anything till spring. But then I started a re-read of Eliot Coleman's Four-Season Harvest and experienced a jolt of inspiration when he described a plastic tunnel design he'd come across while traveling in France.


The genius of this French tunnel is the edges aren't buried under the soil in the usual manner, which makes getting into the tunnel very awkward if you need to plant or harvest things. Instead, the plastic is cut at the soil line and held down with a criss-crossing pattern of string over the hoops. Getting inside to plant or harvest is a breeze. You just lift up the plastic and tuck it under the string.

I had the plastic in the garage. I bought some 1/2-inch PVC tubing at the hardware store and planted the hoops. Then I drilled holes and installed these eyelets for the string. Following the illustration in Coleman's book, it still took me a while to figure out the pattern of the string. It's like lacing your shoes--a little.

Here's a detail of the string, crossing over one hoop, then attaching at the bottom of the next hoop. I'm sure I got it wrong, because my pattern ended before I got to the end of the tunnel. Maybe I didn't have enough hoops. I used cinder block to hold the ends down. I'm sure that's not right either.

In any case, according to Coleman the end of November is way too late to be planting anything. "Don't even bother," he admonishes. There's not enough sun to get the seedlings going. But I'm noticing volunteer mustard greens coming up in the other garden beds. Something down there is germinating.


So today I lifted the plastic and planted a whole array of mustards, kales, collards, spinach, arugula, lettuce, tenderleaf greens and other stuff. We'll see what happens. If they don't grow now, I'm betting we'll see them in the spring. As Coleman says, if they can grow these greens in France in winter--actually much farther north than we are--there's plenty of sunlight here for them to grow as well. It's just a matter of protecting them. Not so much from the cold as from the wind.

Minimum soil temperature for brassica germination is said to be 40 degrees, 35 for lettuce and spinach. Stay tuned....

Friday, July 18, 2008

Lunch

Fried eggs with sauteed beet greens.

Preparation time: 15 minutes

Shopping: none

I can hardly think of a vegetable easier or more delectable then freshly harvested beet greens. I'd been eyeing one particular Franken-beet in our garden. It was unexpectedly huge, some kind of mutant, with greens towering over the rest of its mates. I was weeding in the area this morning and decided it was time to see what this fellow was all about. I pulled it up, and it looked like a giant, red parsnip. No accounting for a beet like that. But nothing goes to waste around the garden. If it's edible, it will be eaten.

I brought the greens inside, let them soak in the kitchen sink to refresh, then sauteed the leaves very simply in the cast iron skillet with extra-virgin olive oil, coarse salt and just the water left on the leaves after lifting them out of the sink. You could season the greens with a little white wine vinegar, or even cider vinegar.

Meanwhile, I melted a spoonful of butter from South Mountain Creamery in the non-stick skillet and fried a couple of eggs from our farmer friend Brett. (These would be the ones that require the five-mile drive to the Chevy Chase farmers market). Dust the eggs and greens with some grated Pecorino cheese. I dabbed some red Sriracha pepper sauce on there as well.

I'll be tasting this for the rest of the afternoon...

Saturday, June 14, 2008

Lunch

Mongrel soup with chickpeas and greens.

Preparation time: 5 minutes

Shopping: none

As often happens, this soup started with a handful of greens from the garden that had been blanched and tossed in the refrigerator. Add a trip to the freezer, where, in the process of a quick clean-out, I discovered a four-cup container of turkey stock and a four-cup container of duck broth. Once upon a time I had visions of this duck broth as the basis of some grand dining experience. Now it was merely filler for the soup pot.

I wanted to make this a bean soup, but the best I could find were some old chickpeas that had been kicking around the pantry. Sweat an onion and a couple of carrots, diced small, along with some parsnip that had been sitting in the crisper drawer too long. Season with thyme. I made the soup a couple of weeks ago. It gets better with age. Now it's just a matter of re-heating.

This is one of those soups that can only be considered my personal food. No one else in the family will touch it.

"It looks like dishwater," says the wife.

Ugly but good.

Friday, May 23, 2008

Freezing Greens

The truth is, we almost always have more food growing in the garden than we can possibly eat at any one time. This is especially true as the temperatures grow warmer. All at once, our pretty little greens--the mustards and Chinese greens especially that we planted back in March--start to grow very tall and begin blooming.

Greens going to seed make a nice display, but it's a bit frustrating because we know the leaves that we had planned on eating will soon be inedible. The trick, I think, is finding a way to preserve the greens, so this year I've been spending my free moments sitting in the garden plucking tat soi plants and mustard green plants individually out of the ground and stripping them of their leaves and preparing them for freezing.

I don't mind this job at all. You sit on your butt and pull slender plants out of the soil and think about nothing in particular. It's another of those meditative acts in the garden that takes you away from your troubles, like composting or counting the holes in ceiling tiles.

The process is fairly simple. Once you've collected a heap of greens, put a pot of water on the stove to boil. Clean the greens thoroughly in the sink, then blanch them for two minutes in boiling water. Remove the greens from the pot and chill them in cold water. Let them sit in a colander a while to drain completely. Now you can pack the blanched greens in freezer bags and store them in the freezer for use later.

I envision these greens being braised at some point with onions and a little vinegar, maybe even some bacon. They could also be used as an ingredient in an egg dish, such as frittata, or in a soup or stew.

The best part about being able to store these greens is relieving some of the guilt I always feel over planting too many.

Saturday, April 26, 2008

Breakfast: Greens Squared

You knew it was coming, didn't you?

The mustard greens we braised on Thursday are even better two days later. Turns out my 8 1/2-inch square baking pan makes nine portions of lasagna with rutabaga greens. So this morning, I am looking at greens every which way.

And the best part may be, these were all planted last fall and they're still feeding us. Let's hear it for overwintered vegetables!

Preparation time: 5 minutes

Shopping: none

A here's the kicker: there's more where that came from.

Friday, April 25, 2008

Mustard Greens Just in Time

We had a party of seven drop in for dinner last night. Fortunately, they brought their own park roast. We cleaned the potatoes out of the pantry, tossed together a salad with croutons and I happened to remember there was a bed of mustard greens about to go to seed out in the garden.

This is red mustard--one of my favorite varieties, with striking color and deeply veined leaves--and if you can believe it, it was planted last September 13. It overwintered beautifully and has done nothing but grow bigger and more vibrant these last few months, making a striking display in the garden and adding its peppery flavor to an occasional salad.

But as mustards and their kin are wont to do, they will begin elongating along the stems when the time comes in preparation for making seeds. When that happens, they are done and it is time to eat them or get ready to watch them flower. I have picked the leaves off flowering mustards. They are not bad, but the flavor and texture begins to go south.

So as guests arrived I was bent over the mustard bed, yanking plants out of the ground, shaking off the dirt, clipping off the roots with a pair of scissors. I dumped the whole lot--about three gallons, I think--in the kitchen sink and filled it with cold water. Then I cut up an onion and began sauteing it with some extra-virgin olive oil in our biggest iron skillet.

Shake some of the water off the greens and roughly chop them. It doesn't matter if you include some stem. When the onion softens, begin adding greens to the skillet and season them with salt. They will make quite a pile, so I would add some, then return to my chopping and add some more, turning them with the onions as they cooked down, seasoning with more olive oil, some cider vinegar and salt as needed.


When all of the greens are in the skillet, they will be braising and steaming in the water they brought with them from the sink. Place a lid over the skillet for a few minutes to hasten the cooking. Then remove the lid and let some of the liquid cook off.

When the greens are perfectly tender, taste for salt and add some balsamic vinegar. We pulled out our best balsamic for this--30 years old, syrupy and sweet, a lovely contrast with the mild bite of the greens. Drizzle the greens with more olive oil to make them smile.

I'm sure there are other ways to cook greens. But this one is simple and surely will remind you how good they can taste, a gift from last year.

Tuesday, March 18, 2008

Lunch: Braised Beet Greens with Red Wine and Sectioned Oranges

We don't make beet greens often because there just aren't enough of them on the typical bunch of beets you buy in the store or at the farmers market.

But this morning I cleared out a whole bed of beets that had been planted last August. (Yes, you heard right--last August.) My haul was quite a load of big, healthy beets, as well as a bin full of greens. I separated the greens from the beets, then filled the kitchen sink with cold water, where the greens got a good soak and a wash. While the greens refreshed, I sorted through them, saving the majority (with stems) and tossing the wilted and damaged ones into the compost container.

I had an idea to braise these greens and literally was casting about the kitchen, looking for things to add to the pot. There were some garlic cloves, some shallots, a partial bottle of red wine and an orange sitting on the countertop. That all sounded good to me, so I fired up my big cast-iron skillet.

In the end, I had about 1 1/2 gallons of greens, so this formula is for a big mess of beet greens. Adjust according to the quantity you have on hand.

In a large skillet, heat a tablespoon or two of extra-virgin olive oil and saute over low heat 3 shallots, peeled and cut into thin rings, and 3 cloves garlic, smashed and roughly chopped. When the shallot begins to soften, start adding the cleaned beet greens. They will be dripping water, which is fine for the braising. After filling the skillet with a 1-inch layer, drizzle some olive oil over the greens and season with a pinch of coarse salt. Turn up the heat to moderate and continue layering the beet greens with olive oil and salt until they are all in the skillet. It will make quite a mound, but will soon cook down.

As the greens cooks, turn them occasionally with your spring-loaded tongs and lower the heat so they just simmer. When the water has evaporated, after about 15 minutes, pour about 1/3 cup red wine over the greens and continue braising. If the skillet runs dry before the greens are perfectly tender, add some more wine. Season with black pepper.

Meanwhile, section two oranges over a bowl, removing the rind and pith but saving the juices. By now the pile of greens will be vastly reduced, enough to serve four to six people as a side dish. Pile the greens onto plates and garnish with orange sections and a drizzle of orange juice.

Fresh beet greens have a hearty, intensely satisfying meaty flavor that is barely reminiscent of beets. There's not much else in the world of greens that can touch them. If you were eating them as a side dish, they'd go perfectly with roast pork. Even better, a gamey piece of venison.

Monday, March 17, 2008

Overwintered Salad

Something inspirational is happening in the garden. The many greens I like to put in my salads have shaken off their winter stupor and our bounding back into a new season. As they revive, we begin picking again, putting a healthy assortment of greens on the dinner table.

Mustard greens are great for cooking. But if the leaves are picked while still young and tender, they make a great addition to a salad. I particularly like this red mustard for the rich color it adds to the salad bowl.

You may be getting the idea that I like sharp flavors in my salad. In fact, I love sharp peppery greens even as just an accent in an otherwise mild salad. Mizuna is one of my favorites. Its frilly foliage looks great in the garden as well.


I never seem to have enough arugula seed on hand. I don't ever want to be without arugula. It has a robust, spicy flavor and a great chew. Sometimes I just dress it with a little lemon and extra-virgin olive oil and eat it all on its own.


We even have some lettuces making a comeback. This "Red Summer Crisp," one of about 15 different lettuce varieties I planted last year, seems to be particularly determined to carry on. Before long, though, it's bound to go to seed.

Sorrel is a perennial. It loves these cool, early spring days. Its citrusy flavor is great in a sauce for fish, blended into a pesto or just torn up for a salad. Kids love to pick it right out of the garden.


Cilantro doesn't last long in the heat here in the District of Columbia. This plant came through the winter in grand shape. The flavor is the best I've ever tasted. I'm beginning to think overwintering cilantro should be a permanent part of our garden plan.

Parsley is a biennial, meaning it goes to seed in the second year. Already it is taking on a woolly appearance. It won't matter how furiously you harvest it--this parsley is determined to replicate. It's almost better just to dig it up and plant some new seed.

Saturday, March 15, 2008

Dark Days: Accidental Gypsy Soup

This particular accidental soup begins by cooking some greens in a pot of water and then forgetting about them or just letting them cook longer than you originally intended.

In fact, I had turned the heat pretty low. But nothing gets past my wife, the professional chef. She took note of how long the greens had been cooking, how all the nutrients had been leached out of the greens into the cooking water, and relayed this information to me in the way that spouses sometimes do. I explained that I had purposely turned the heat down so the greens wouldn't overcook, to which my wife replied that the cooking had been going on for at least an hour--she knew precisely, because we had just finished our weekly yoga session, which is an hour long.

Just as this discussion was gathering momentum, a small voice was heard to suggest using the water in which the greens had been cooking as a soup base. This would be our friend and yoga instructor Beth, who happened to be sitting at the kitchen island sipping a cup of coffee and listening in. As friends sometimes do, Beth was trying to rescue the situation. It had not occurred to me to use the cooking water for soup. I grabbed a spoon and tasted. Brilliant!

Flash forward to that evening. Dinner time approaches. I am seated at the kitchen table with our dog-eared copy of The Moosewood Cookbook, reacquainting myself with the recipe for one of our favorite dishes from that classic volume, "Gypsy Soup." We had flashed on this particular soup because it contains a quantity of sweet potatoes, and we had received a number of sweet potatoes in our weekly CSA box.

Sweet potatoes plus my (overcooked) greens, also from the CSA box, plus the aforementioned cooking water sounded like an amended version of Gypsy Soup. I was literally ready to start chopping onions when I noticed my wife heating up the stock pot to cook an artichoke for our daughter--that being the stock pot in which I had been saving my soup base.

"Where's the soup base?" I inquire.

My wife gives me stricken look. "Oh," she says.

"You threw out my soup base?"

Apologies. Lots of apologies.

Well, I thought that might be the end of our Accidental Gypsy Soup, what with the soup base having gone down the kitchen drain. But I adjusted. The Moosewood Cookbook suggested using stock or water in this soup. So I just used water--filtered water. It came out fine, using our CSA sweet potatoes and a few other things from the crisper drawer and the pantry.

What makes this soup are the spices and herbs: lots of paprika, turmeric, cinnamon, dried basil.

Heat 3 tablespoons extra-virgin olive oil in the bottom of a heavy pot or Dutch oven and add a large onion, diced medium, three medium carrots, peeled and diced, 1 large sweet potato, peeled and diced medium, and three garlic cloves, chopped fine. Cook for about 5 minutes, or until the onions begin to soften. Add 2 teaspoons paprika, 1 teaspoon turmeric, 1 teaspoon dried basil, a dash of cinnamon, a pinch of cayenne and a bay leaf and cook a few minutes longer.

Stir into the pot 1 1/2 cups cooked greens (such as kale, collards, Chinese greens) roughly chopped, 1 14-ounce can diced tomatoes, drained, and 1 14-ounce can chickpeas, or 1 1/2 cups cooked chickpeas. Cover with enough stock or water to make the soup the consistency you prefer. We like ours on the thick side. Bring the pot to a boil, then reduce heat and simmer until the vegetables are all cooked through, about 10 minutes.

To serve, season the soup with about 1 tablespoon tamari and ladle into warm bowls. A thick slice of crusty, whole-grain bread would be excellent with this.

Wednesday, March 5, 2008

Breakfast

Leftovers: sweet potato galette, greens and sauteed mushrooms.

Preparation time: 5 minutes

Shopping: none

The sweet potato galette is delicious any time of day. The greens arrived last week in our CSA box. Typically I do not wrack my brain over how to prepare them, but simply boil all the various greens together then use them as a side dish with a drizzle of extra-virgin olive oil and red wine vinegar, or as an ingredient in frittatas, soups, etc.

As for the mushrooms: I am always buying more than we really need. I cook them down to keep them from going bad, then they are handy for a meal on short notice.

Wednesday, December 26, 2007

Breakfast

Poached egg with greens and grated Parmesan.


Preparation time: 10 minutes


Shopping: None


We ate unconscionable amounts yesterday. There was no question but the thing to have for breakfast was something simple and reassuring.


Poaching an egg is as simple as bringing a small pot of water to a simmer. Add a tablespoon of white vinegar to help hold the egg together. It's always best to use the freshest possible egg for poaching. Old eggs like to fall apart. In this case, the egg is laid by a pastured hen and comes in our weekly CSA box.


The greens also come in the CSA allotment and were cooked ahead, just waiting in the fridge. I heat them separately in the microwave and season with coarse salt, ground pepper and a splash of white wine vinegar.


When the egg is ready (meaning the white just barely cooked and the yolk runny--my preference), remove it from the water with a slotted spoon, place on top of the greens and grate Parmesan cheese all over. Give it another grind of pepper.


The yolk and greens go so well all mixed together. The only thing that could improve this might be a wee glass of Chablis to treat the head from last night's festivities.

Sunday, February 18, 2007

O Winter, thy touch is harsh!


Last year I erected a plastic "tunnel" in my front-yard vegetable garden to protect my plants from the winter freeze. I bought some galvanized metal electrical conduit, bent it into a series of hoops and covered it with plastic sheeting. (This was before I learned you can basically do the same thing much more easily with PVC tubing. But then, as a "sustainable" organic gardener, should I be using metal conduit, PVC or plastic sheeting? Let's save that one for another day...) This winter, I had to dive back into my Hawaiian shirts for clothing. The weather was absolutely balmy, and all the talk was about whether global warming would bring citrus culture to Washington, D.C. Well, as I kept reminding people, February can rear up and kick you in the butt, and this February certainly did that. We've had one of the longest streaks of sub-freezing temperatures in years this month. Even in the city, overnight temps have been in the low 'teens. And now we have a layer of hard-packed, ice-encrusted snow covering the garden, so it's any body's guess what's happened to all those salad greens, arugula, mustard, kale and collards that had been coming along so nicely just outside my front door, where I decided not to repeat my plastic tunnel. In the picture above, you can see my rather lifeless looking collards. One can only hope they haven't been utterly destroyed and somehow will find a way to resurrect themselves when things warm up again.
Which brings me to the subject of eating greens. Growing up outside Chicago, the closest thing to greens we ever saw on our dinner table was frozen spinach. But ever since we began our farm subscription, I've grown extremely fond of all those leafy brassicas I mentioned earlier. I particularly like the spicy, peppery taste of hearty arugulas and mustard greens. When these vegetables are grown outdoors, and if they are of the truly hearty varieties, their flavors only intensify in the winter cold. The particular farm we subscribe to, Even'Star Farm in Lexington Park, MD, specializes in breeding cold-tolerant greens. Some of you may remember me writing in the Washington Post food section a couple of winters ago about the farm's owner, Brett Grohsgal, and his passion for dressing up in Carhartt overalls in the middle of January and spending hours outdoors in the numbing cold, stooped over his improbably lovely fields of winter greens. The payoff for us was the box that arrived weekly from Grohsgal's farm, filled with bags of different greens, salad mixes, radishes, baby rutabaga, fresh eggs and all sorts of homemade jams and sauces, the occasional stewing hen.
The surprise for me was that not everyone had the same taste for greens. At a small dinner party I catered one evening, I served greens braised with red onion and pomegranate molasses, one of my favorite treatments. I wasn't quite sure how flattered I should be when the host introduced me to the rest of the guests saying, "He's the only person I know who can make mustard greens taste good." Another client I thought was enjoying the local greens I was serving in his weekly meals floored me one day when he said, "You know, I don't think I really like the greens. Could you maybe just give me a salad instead?" We had friends who discontinued their subscription because they just got tired of seeing greens every week and not knowing what to do with them.
I admit, on this latter point I had also stumbled. There was such a variety, and so little time. Arugula, cress, collards, kales, tat soi, pak choy, mustard greens...After a while, your eyes kind of glaze over. How could I possibly find a way to treat each of these as food? So, after a while, I didn't. What I decided to do was not treat each of the greens as individual food, but to treat them as ingredients. When the packages of greens arrived, I would fill a big pot with salted water, bring it to a boil and dump all the greens into the one pot and cook them through. Then I would chill them down in cold water, wring all the water out of them, and chop them up for use in a fritatta, say, or a soup. I'm sure in this process I was not doing justice to each and every one of the greens. Some of them may have preferred to be sauteed, or stir-fried, or just blanched. But I figured this small sacrifice was worth the greater good of actually consuming all the greens that Brett Grohsgal was growing for us. Still, I am always looking for new and better ways to use my greens. They don't seem to hold the attention of many food writers. So when I ran across a cookbook titled The Collard Patch, I couldn't resist. I had to buy it (I rarely fork over good money for new books) and see how authors Mary Lou Cheatham and Paul Elliott had managed to fill a whole book with collards.
To review briefly, The Collard Patch is a rather large paperback with a note on the cover that says, "Collard Country Cookbook and Reader Collards and Cornbread Y'all Will Love." Most of the beginning chapters covering collard history and collard culture--as well as using beer to kill slugs--are only a page long. There are also short chapters entitled "Dirt Eating, All the Facts You Never Wanted to Know," and "Lasting Magic of Collards, Pot Likker sustains Us Still." The real meat of the book is in the recipes, of which there are probably 150 (I didn't count them all.) These range from the most basic--Bacon Seasoned Collard Greens--to the decidedly plebeian--Collard Mayonnaise Souffle--to what you might call Haute Collards--Collard Crepes. And so many more ingenious turns on greens, such as Collard Hash Eggcups, Huevos Collards and Collard Tahini Pasta Casserole. And after you've completely exhausted yourself with collard recipes, you can kick back and enjoy some of Mr. Elliot's memoirs, consisting of a series of short stories such as, Alligator Snapping Turles, A Lapful of Cow and Jed, the Prickly Pear King.
Now, if that doesn't put you in the mood to eat some greens, I don't know what will. (You can find the book online at http://www.collardlovers.com). To further entice you, I leave you with my latest most favorite treatment for greens--a sweet potato galette with greens and fontina cheese. Making the galette works best with a large (11-inch), oven-safe, non-stick skillet.
12 ounces greens (can be kale, collards, mustard greens or combination)
3 large sweet potatoes, peeled
extra-virgin olive oil
1 wedge fontina (or fontal) cheese, grated
salt & pepper
Bring a large pot of salted water to boil. Place greens in boiling water, reduce heat and cook until greens are very tender, about 20 minutes. Remove greens and plunge into a bowl of very cold water in the kitchen sink. Drain greens through a collander, pressing as much water as possible out of the greens. Chop the greens roughly and set aside.
Pre-heat oven to 350 degrees.
Meanwhile use a mandoline or vegetable slicer to slice the sweet potatoes very thinly, about 1/8-inch. Heat your skillet over medium heat and moisten the bottom and sides with extre-virgin olive oil (or a good spritz of spray oil). Lay sweet potato slices in an overlapping pattern--like shingles--to cover the bottom and up the sides of the skillet. Cover the layer of sweet potatoes with a sprikling of cooked greens. Season with salt and pepper. Add another layer of sweet potatoes. Cover this layer with grated cheese. Continue making layers in this pattern until the skillet is full but not overflowing. If you have a flat pot lid that is just slightly smaller that the inside of your skillet, use it to press down on the your galette firmly. This will help fuse the layers together. Now place skillet in oven on a baking sheet (in case some of the cheese spills out) and bake for about 45 minutes, or until the potatoes are very tender. Test for doneness with a trussing skewer or the tip of a paring knife.
Remove the skillet from the oven and allow to cool for an hour or more, or even overnight. Then carefully invert the galette onto a large plate or carving board and slice into wedges. The wedges can be re-heated in the microwave or in an oven on a baking sheet. Serve with roast pork, turkey or chicken.