Saturday, April 7, 2007

Edible Chesapeake is Here!

My piece about killing pigs and making sausage at a "matanza" in Southern Maryland last month appears in the Edible Chesapeake magazine out this week.

The article is spread across two pages, with photos, under the "Extreme Local" heading.

Whole Foods, bless their sole, is giving away free a limited number of copies of the magazine.

Edible Chesapeake, a quartly publication, is part of a family of "Edibles" aimed at local and regional audiences nationwide that promote local foods. Annual subscriptions are $28.

Be bold. Get one. Eat local.

Friday, April 6, 2007

Mache Rescue

On my tour of the garden this afternoon I finally resigned myself to the demise of my little bed of mache. It had survived the winter, but it was being overtaken by the dratted chickweed.

I fetched my stirrup hoe and started digging. But lo and behold! It was like Moses parting the Red Sea. The mache went right, the chickweed went left. Soon I was on my knees, shaking out the clumps of perfectly formed mache and filling a big bowl with it.

I'm seeing the makings of a nice salad for Easter.

Oh, ye of little faith...

Tamales: Disaster Relief

After yesterday's comedy of stuffing too much masa into the mixing bowl, we collected ourselves and set about the task of actually making some tamales.

My wife joined me for a consult as I tried to decide on the best method for spreading the dough on the corn husks and folding the husks into neat little packages.

The first thing my wife commented on was the dough itself. She found it stiff.

"When I've seen ladies making tortillas, they smeared the dough on the husk," she said.

My dough was more like modeling clay. You had to press it with your fingers. I had suspected something was amiss because the recipe I was using, from a cookbook devoted to tamales, had said the dough should be "like a thick pudding." I wondered what kind of pudding the author had in mind.

We began constructing a mis en place for making tamales, meaning we lined up all our ingredients in assembly-line fashion. I wanted to make at least 20 tamales to take to the first of my "food appreciation" classes later in the day. Since the tamales need to steam for an hour on the stove top, I would have to start them cooking on the stove at school before the students arrived for the first class. That way they'd have some tamales to sample before the class ended. I would show them how to make the tamales, but they would eat the ones I prepared earlier. Then the next class would eat the tamales made by the first class. And so forth over the course of two days of classes.

So what you see in these pictures is our system for tamale production. The corn husks, purchased at a local Latino grocery, have been soaking overnight in a basin of water. We spread about 1/4 cup of dough in a rectangular shape in the center of the corn husk, leaving about two inches of husk uncovered at the top and bottom. On the dough we place a small dollop of chicken filling made with crushed tomato, oregano and cumin. Then we place a matchstick slice of potato and one of zucchini, followed by a small spoonfull of salsa verde and three or four golden raisins.

Since the corn husks vary in size, you learn along the way to vary the amount of dough you spread on the husk. The object is to have just enough dough so that you can overlap the edges of the husk when you fold it closed, then fold the ends over to create a packet. Too much dough and the package will not close. Too little dough and you are just wasting the unused husk.

Traditionally the bundle is tied with a strip of corn husk, but I decided that string--or butcher's twine--would be easier to learn with. Even though we are experienced cooks, we're just beginners where tamales are concerned.
I fumbled at first, but my wife caught on right away. What a surprise! What we really needed was a Mexican grandmother, someone who could show us how it's done. Still, before long, my wife had her own system. She was making three at a time. I was anxious to cook them and see how they tasted.

Tomorrow, a surprise turn, another lesson learned and a happy ending to our tamale saga.

Wednesday, April 4, 2007

Kids, Don't Try This at Home

Have you ever tried a cookbook recipe that was so wrong you wondered if anyone ever tested it before it went to the publisher?

I'm making tamales with the kids in my "food appreciation" classes. I approached the subject with some fear and trepidation, for, although I love Mexican food, and although I'm quite good preparing some Mexican foods, making tamales had somehow eluded me all these years.

I thought they'd be just the thing for Easter.

For a recipe, I sought a book exclusively about tamales. The author's bona fides appeared to be in good order. But something about the recipe didn't seem right: 12 cups of Masa, or corn flour mix; 7 cups of chicken broth; two cups of lard; 1 tablespoon salt.

Not that the ingredients or proportions sounded off. It was the quantity. Just mix in the blender with a paddle attachment, the author advised.

Against all my better instincts, I followed the directions. I was a bit alarmed as the 12 cups of masa dough piled higher and higher in the mixing bowl, finishing just short of the rim.

Something bad is going to happen here, I thought.

Trust me
, I heard the author saying.

I turned on the blender--slowly--and began adding chicken broth.

Sure enough, the masa started to grow. And grow. And grow. Soon I was the main character in an I Love Lucy episode: Balls of masa were spillling out of the bowl. Balls of masa were leaping out of the bowl. And still the masa continued to grow. And grow. And grow.

I didn't know whether to curse or laugh outloud. I'd made a complete fool of myself and I had one hell of a mess to deal with. There was masa everywhere. Not what I needed first thing in the morning.

Finally, I'd had enough. Screw the blender. I dumped the whole thing on the counter top and started kneading it by hand.

I looked back at the recipe to see if I'd missed something. Had the author perhaps called for the use of a commercial-type blender, something much bigger than my household Kitchenaid? But the only guidance was this: "In the bowl of a heavy duty mixer...."

There were other things about this recipe that were just plain off. I looked at the huge pile of masa dough on the counter and started thinking this was going to make way more than the "2 or 3 dozen" tamales the author claimed. More like 5 or 6 dozen, it turns out.

The recipe also called for a 1/2-cup scoop of dough in each tamale. The author must have been using some kind of giant, Chernobyl-type corn husks to wrap her tamales. I'm finding that 1/4 cup of dough per tamale is more like it.

Too much chicken, not enough tomato in the filling. Quarter-inch slices from "large Russet potatoes" to be added to the filling, but no indication whether this meant a slice from the whole length of the potato, or something smaller. On and on...

"Did you look at other recipes?" my wife asked. "Usually when I'm researching something, I look at all my recipes before I start cooking."

Duh. Of course I hadn't. What was I thinking? I have volumes by Rick Bayless and Diana Kennedy, as well as other Mexican cookboks I've collected over the years. I could easily have checked. In fact, a little voice had told me to check and I had ignored it. Whatever made me think that a cookbook, simply because it was devoted exclusively to tamales, would be more authoritative?

Lesson learned: There really are some crappy cookbooks out there, even the ones (maybe especially the ones) with all the gorgeous photos. Even the ones with glowing editorial reviews at Amazon.com. I must say, though, this one does have some dynamite illustrations on the many different ways to fill and tie the finished tamales.

Tomorrow, we put this episode into our memory bank and begin to actually assemble and cook our tamales.

To be continued....

Tuesday, April 3, 2007

Springtime mit Kraut

I know what your thinking: This is no time to be making sauerkraut. Enough cabbage! Enough of winter vegetables! Bring on the fava beans, the asparagus, the artichokes!

Ya, ya, ya. I know all that. Thing is, I'm on a mission. In about a month, I have to feed all the parents of the kids I teach in my "food appreciation" classes. Including the kids and the after-school staff, that's about 100 people. And the food needs to be somehow representative of the things we've already made in the class. At least I think it should.

In fact, I just got to the bottom of the huge bucket of sauerkraut the kids and I made in class last December. Now, that was a sauerkraut! It had reached perfect ripeness, just sitting in a back room of my house. Not only did we serve it in class (with sausage), but I had enough to cover at least two choucroute-style dinner parties. And I still have two eight-cup containers full in the fridge.

All it cost me was the price of the cabbage and a little bit of salt. Nature does the rest.

Personally, I could eat this kind of sauerkraut--naturally fermented, with live bacteria in it--all year long. I do understand the urge to leap into spring. But there's just something terribly exciting about pulling back the kitchen towel that covers my bucket of kraut and tasting the sauerkraut as it morphs into delicious ripeness. I've never made any bad sauerkraut, but I do contend that I am getting better at it. This last batch was the best ever.

The point is, I thought that while I'm making a new batch, I'd show you how simple it is. You will need a kitchen scale, a couple of big bowls (preferably stainless), five pounds of cabbage (that's two or three heads, usually), some pickling salt or fine sea salt, and a clean, heavy-guage plastic bucket (everyone will tell you a "food grade" bucket, which you might be able to get at a restaurant or your local deli, but I simply buy a new bucket at the paint store.)

Here's what you do:

Put your stainless bowl on the kitchen scale and adjust the reading to "zero." Start thinly slicing the cabbage. I usually do this by hand with a serrated knife. Divide the head in quarters and remove the core and any damaged outer leaves. Then lay the quarter on its side and slice into widths of about 1/4-inch. Add the sliced cabbage to the bowl until you have, say, 2 1/2 pounds. Put the cabbage in a second bowl (I use a restaurant-style plastic bus tub) and begin tossing with salt. The formula is, 3 tablespoons salt for every 5 pounds cabbage.

As you finish salting batches of cabbage, transfer it into your bucket (I use a 5-gallon bucket, but a smaller bucket would be perfectly adequate depending on how much kraut you are making. You can also purchase ceramic crocks that are made specifically for sauerkraut.) Press the cabbage down firmly--as hard as you can--using your balled fist as illustrated in the photo above.

Continue this process until you have all of your cabbage salted and pressed in the bucket. What I made yesterday was 20 pounds of cabbage to feed about 100 persons, or roughly 3 ounces per person, which is plenty. That represents a little over 22 pounds of cabbage that I purchased at the store, minus the cores and damaged leaves.

Place the bucket in the coolest spot in the house, maybe in the basement, and cover it with a clean dish towel. Take a look at it the following day. There should be plenty of liquid in the bucket now, representing all the water the salt has pulled out of the cabbage. This is the brine in which the beneficial bacteria grow that ferment the cabbage, turning it into sauerkraut. Brine is good.

Note: you do not need to add any bacteria to your kraut. The bacteria are already present on the cabbage when you buy it at the store and in the atmosphere all around us. That's why this is called "wild" fermentation. And it is, don't you think? Wild?

Now you just need to find a heavy ceramic plate, or cut a piece of non-resinous wood, such as ash or oak, that will just fit inside the bucket. Press this down until the brine comes over the top of the plate or the wood and weigh it down with a heavy non-reactive object, such as a plastic jug filled with water. It is very important to keep the cabbage submerged in the brine and free of oxygen to avoid spoilage.

If for some reason there's not quite enough brine, just add some water. I've never had to add water.

Replace the dish towel over the bucket and monitor your kraut every few days. You may see a layer of mold growing in there. Not to worry: just scrape it away. You should have finished sauerkraut in a couple of weeks or a month or perhaps more, depending on the ambient temperature. The bacteria like a temperature around 68 degrees. A lower temperature just slows them down. A higher temperature speeds them up. I prefer a slightly lower temperature to give the cabbage a good, slow aging--one reason why its easier to make the sauerkraut in winter.

When the sauerkraut tastes right to you--or tastes the way you like it---you can serve it up or store it in the refrigerator. It will keep for months.

Damn You, Birds!

I am sitting in my kitchen, staring at a bunch of starlings pecking at my vegetable beds. I’m feeling a bit paranoid, because last spring I watched birds very much like these descend on my vegetable beds and attack my emerging bean and cucumber plants.

I went out to the garden to see what the birds were pecking at and found that all my little seedlings had been nibbled down to nubs. What could have possessed the birds to do that? I wondered. Since when do birds eat plants? Were they trying to send me a message?

Well, probably not. This was just my initiation into that fraternity of gardeners and farmers who, through the ages, have railed at the brickbats and insults and sometimes just plain mysterious curveballs that nature dishes up. Drought, hail, locusts and now birds. Welcome to the world of trying to grow your own food!

Mine is an inner-city garden, which makes me an urban farmer, I guess. Three years ago, I wrote an article for the local paper about a young farmer in Southern Maryland who is passionate about growing greens outdoors in winter. He loves nothing better than dressing up in a pair of Carhartt coveralls in the middle of January and picking arugula in the freezing cold.

I was inspired. My wife and I signed up to receive weekly deliveries of the farmer’s winter greens. And I wondered if there was any reason I could not do this in the city. I mean the growing food part, not the dressing up in Carharrts in the middle of winter part.

We live in a big house on a big corner lot in the Columbia Heights neighborhood of Northwest Washington, about a mile from the White House. The neighborhood had fallen on hard times when we bought our house. There was no landscaping in the front yard. I had never given it much thought before. But now, instead of crab grass and dandelions and chickweed, I saw beds of tomatoes and cucumbers and carrots. I saw rows of leafy lettuces and tall, spiraling Brussels sprouts. I saw my own truck farm smack dab in the middle of the city that would feed not only me and my family, but my personal chef clients as well.

One day I picked up a spade and just started digging.

I may have neglected to mention that although there was no landscaping in our yard, my wife had plans for landscaping. Detailed plans.

“What are you doing?” she asked when I started digging.

“Planting vegetables,” I said.

“Where, exactly?” she asked.

“Right here,” I said, pointing to a spot in the front yard.

“Don’t get too attached,” she replied.

We did pretty well that year with my first vegetable bed. We harvested tons of cucumbers and radishes. The Brussels sprouts took forever, but eventually we had enough for a few meals. We had a fair crop of tomatoes, although the tomato plants came down with some kind of awful wilt. We had lettuce.

But I wanted more. So the next year I started digging again, tearing up sod, pulling tons of rocks and broken glass and strange pieces of metal out of the soil.

“What are you doing now?” my wife inquired.

“More vegetables,” I said.

“You can’t plant there,” she said. “That’s where the front walk is going.”

I kept digging. It was a race against time.

It is said that everyone longs to grow things, that we all have a secret dream of becoming a farmer. I think I was just following behind my father, a sort of renegade brush salesman who dug up part of the forest preserve behind our house when I was a kid to plant rhubarb and strawberries and tomatoes.

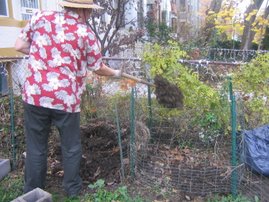
As my garden grew, I was determined to make it as self-sufficient as possible. Call it enviro-gardening: I started composting. I built a three-bin system to compost yard wastes and grass clippings and kitchen scraps. Pretty soon I was cruising the neighborhood, picking up bags of dried leaves my neighbors left at the curb.

Then I took classes to become a Master Gardener. Then I built a huge container garden at my daughter’s charter school down the hill.

Obviously, I was turning into some kind of gardening nut.

In the summer, I built trellises for the beans and the cucumbers to climb. The okra stood eight feet tall, exceeded only by the sunflowers and the amaranth. Now we also had huge beds of zinnia and marigolds and dill and basil. I had parsley to feed an army. I made dill pickles in August and pickled green tomatoes in October.

I kept waiting for someone to come along and say, “You can’t do that.” But the neighbors love it.

People—strangers--on their way to work stop, lean on the iron fence and chat about the gardens they had when they were growing up. How their grandmother used to plant lima beans. People—strangers—stop at the red light across the street and shout encouragement out their car windows.

“What’re you planting there?” they shout.

“Oh, just about everything,” I shout back.

This year practically the whole yard is under cultivation. Yep, all except one little spot where my wife put her foot down. She keeps threatening to bring in a crew to build a retaining wall. She keeps pointing to spots where my vegetables are going to be under a walkway.

I keep planting.

My wife and I have reached an accommodation. We are going to combine my vegetables and her design to make an edible landscape. As for the birds, I am hip to their tricks. This year I bought fabric row cover to keep them off my seedlings. Take that, you birds!

Monday, April 2, 2007

Lavender-Vanilla Dusted Scones

Some foods don't have to take forever and a day to make my favorites list. Take these scones from Marion Cunningham's The Breakfast Book.

The recipe requires only eight incredients that you probably already have in your pantry. It takes about five minutes to throw them together and make the dough. Then 15 minutes to bake. So in less that a half hour, you have warm, delicious scones to go with your morning coffee.

The attraction of scones is biting through the only slightly crusty exterior and finding a soft, warm interior dotted with bits of dried fruit. They are only a bit crumbly and hold together almost as well as a muffin. When my wife makes them, they aren't even browned, really. Just hinting at the baked look you see in this picture.

I'm not a baker. I'm much more comfortable around the barbeque. But I started making these scones for the monthly meetings of a local gardening organization here in the District of Columbia (D.C. Urban Gardeners, which you can find ahttp://www.dc-urban-gardeners.com/). I also bake a batch on Saturdays to sell at the produce stand we hold during the warmer season outside my daughter's charter school.

The recipe calls for chopped dried fruits such as apricots, prunes or figs, plus a small amount of golden raisins. But I usually use whatever I have on hand, sometimes dried cranberries, sometimes dried blueberries, sometimes just raisins. Feel free to improvise. I also like to use a long chef's knife to cut the dough into wedges. But you can also divide the dough with a round cookie cutter, or even make heart shapes.

These are a comfort with breakfast or to display on a brunch buffet. After I made them several times, my wife bought a bottle of lavender-scented vanilla sugar to dust the scones instead of the plain granular sugar that Marion Cunningham calls for.


For One Dozen Scones (Or Ten Large Wedges)


2 cups all-purpose flour

1 tablespoon baking powder

1/2 teaspoon salt

1/4 cup sugar

1/2 cup chopped dried fruit (apricots, prunes, figs, etc.)

1/4 cup golden raisins

1 1/4 cups heavy cream


Glaze


2 tablespoons butter, melted

2 tablespoons sugar (or lavender-vanilla sugar)


Preheat oven to 425 degrees. Use an ungreased baking sheet.

In a large bowl, mix all the dry ingredients and the fruit. Pour in cream and mix just until all the ingredients are incorporated. Turn the dough out onto a flat surface lightly dusted with flour and kneed about eight times, or until the dough is firm with just a bit of shine to it.

Use your fingers to press the dough out into a circle about 3/4-inch thick. Cut into wedges or use a cooking cutter to cut into 3-inch circles. Place cut dough onto baking sheet. Brush with butter and dust with sugar. Place in oven.

Bake 15 minutes, or until scones are lightly browned. Place on a wire rack to cool. Serve warm.