Showing posts with label cucumbers. Show all posts

Thursday, September 18, 2008

Kids Put Up Simple Dills

High on my list of priorities is finding a simple, satisfying recipe for vinegar-brined dill pickles that will store in the pantry for a long time. For purposes of my "food appreciation" classes, it would also help if the whole process--from cucumber to finished pickle jar--could be accomplished in less than an hour.

Well, this might be it. I've adapted somewhat the formula right off the back of a container of Mrs. Wages Canning & Pickling Salt. For you teachers out there, this is a great exercise in standard measures (how many cups in a quart, tablespoons in a cup?) as well as addition, multiplication and division. In fact, there were a couple of conversions that even had this teacher stumped.

Brining with vinegar is a bit simpler that fermenting pickles in a salt brine. (The kids have been eating the pickles we fermented earlier in the month and loving them.) Both processes have the same aim of creating an acidic environment that prevents the growth of harmful bacteria. It's an age-old method of preserving food for the winter. And don't we all like a good pickle with our corned beef sandwich?

This method does go fast and the kids get a good introduction to canning tools and the canning process, as well as practice on their vegetable cutting skills. With kids, it's important to show them how to slice a whole cucumber lengthwise in half, then lay the halves flat on the cutting surface to slice them into quarters or spears. Chasing vegetables around a cutting board only invites accidents.

To make 4 pints:

4 clean, hot pint-sized canning jars with new lids
2 pounds small pickling cucumbers (such as Kirby)
several sprigs dill weed
4 cloves garlic, peeled and crushed
3 cups water
1 1/2 cups white vinegar
1/3 cup pickling salt (or additive-free sea salt)
3 Tablespoons granulated sugar

Cut the cucumbers lengthwise into quarters (spears). Place a small handful of dill leaves and a garlic clove at the bottom of each jar. Pack the jars (not too tightly) with cucumber spears.

Meanwhile, bring the water, vinegar, salt and sugar to a boil in a saucepan. Ladle the brine into the jars, leaving about 1/2 inch headroom. Screw on lids and process in a boiling water bath for 10 minutes. Remove jars. When cool, store in a cool, dark place at least three weeks before opening.

Note: It really helps to have some basic canning equipment, such as a jar lifter and wide canning funnel. Water kettles with a wire rack are standard equipment. I improvise, using my pasta pot with a drop-in strainer. That's to keep the bottom of the jars from making direct contact with the heat. The water should cover the jars to a depth of at least one inch.

Monday, September 1, 2008

Out With The Cukes

Today was time to say goodbye to our cucumber plants. They've been great producers, making hundreds of pickles. Pulling them out of the ground isn't easy after watching them daily since they were first planted on May 25. I gather one last bowl of cukes. You can see how the plants as they age begin making cucumbers of unusual shape and color.

This is what they looked like, on the right, only a couple of weeks ago. We planted two varieties of pickling cucumbers, Cross Country and Rhinish. They eagerly climbed a trellis made by hanging string from PVC pipe. Filling out the bed were several Italian zucchini plants and, at the far end, two Tuscan kales.

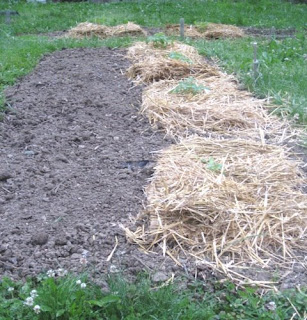
This is the same bed this morning, after the cucumbers were torn from the trellis and the squash plants pulled from the ground. It's time to get this area ready for a new crop. We want to try a second planting of potatoes. Potatoes are normally planted around St. Patrick's Day, but we have some seed potatoes from our farmer friend Mike, who thinks at a minimum we should be able to harvest a nice batch of "new" potatoes before the first hard frost.

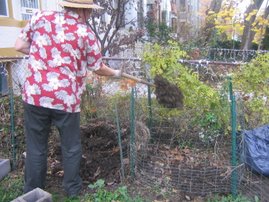
The cucumber plants, meanwhile, were carried to the compost heap and chopped into smaller pieces. Their destiny now is to feed next year's crops. They have our thanks.

Thursday, August 28, 2008

Crock Pickles

Cucumber season is nearing an end for us but we are still working our way through the pickle lexicon. Here's one called "Gram's Crock Pickles" that I like for a semi-sweet tang. I also like that you can use somewhat larger than usual cucumbers for these pickles and remove the seeds. Somehow a few cukes manage to avoid detection and grow bigger than we would like. Use them here.

This is another recipe from "Pickled" by Lucy Norris. These are similar to the mustard pickles we wrote about earlier, a recipe some people objected to because it calls for artificial sweetener. Note the cloudiness of the brine from powdered mustard. These pickles are a bit less sweet and more full flavored, owing to a generous use of cider vinegar.

To make 3 quarts:

3 pounds pickling cucumbers
4 cups cider vinegar
1/4 cup pickling salt (or sea salt without additives)
1/4 cup sugar
1/4 cup powdered mustard

Trim both ends from cucumbers. Cut cucumbers into quarters (spears) and scoop out seeds. Tightly pack cucumbers into clean quart jars.

In a non-reactive bowl, mix vinegar, salt, sugar and powdered mustard. Pour brine over cucumbers to cover and screw on lids. Let pickles rest for at least 2 days, or until the cucumbers turn from green to brown. Store in refrigerator.

The pickles will be ready to eat after a few days. Don't be afraid to test one as your appetite mounts. According to Norris, they will stay crisp for a month, but will remain edible for six months. If you were careful to remove the blossom end of the cucumbers they will stay crisp longer. The blossom end contains an enzyme that likes to turn pickles soft.

Friday, August 8, 2008

Pickle Round-Up

All you skeptics out there should know that our Hungarian sun pickles, which sat outside our front door for four days in a two quart jar with a fat slice of rye bread, produced some of the best pickles we've ever tasted. These pickles are incredibly crisp, not too salty, with just enough flavor of dill and garlic and a faint, yeasty sweetness.

We don't exactly understand how this fermentation works, between the salt and the yeast, but this may be our new favorite pickle of all time. One reader calls them "penicillin pickles," yet they are incredibly easy to make. Unfortunately, they won't last forever, so we are eating some every day.

It's been a month now since we first started making our pickles. We've made quite a lot, and several different kinds. Here's a roundup:

Deli-style dills: We love these crisp, fermented half-sour pickles. It's the perfect pickle to eat with a corned beef sandwich. They are easy to make, the basic formula being two tablespoons of salt for every quart of water, then add dill weed, garlic cloves, peppercorns and oak leaves. Five or six days later, you should have a small bucket-full of pickles that will last a week or two.

Martha Stewart's Refrigerator Pickles: I wasn't expecting a lot from these pickles. They were a little bland at first, being preserved in white vinegar rather than fermented. But they have gained flavor over time and they are growing on me. Quick and easy, and they last a long time. I like nibbling on them with a piece of cheese.

Sweet & Sour Pickles: I wish these pickles were a little firmer. Perhaps I processed them a bit too long. But the combination of vinegar, sugar, cloves and celery seed provides a jolt of flavor. They are fun and addictive.

Bread & Butter Pickles: These also have to be near the very top of our list for most outstanding pickles. Don't spare any effort: get yourself some pickling lime for the long soak these pickles require to turn out firm and extra-crisp. These are a dense, full-flavored pickle with cider vinegar, sugar, cloves and ginger. Sit yourself down with some of these and a peanut butter and jelly sandwich.

Oak Leaf Pickles: If you spend enough time in the pickle literature, you'll see all types of recipes calling for oak leaves, grape leaves, cherry leaves, currant leaves. The tannin in the leaves is supposed to help keep the pickles crisp. The original recipe for these pickles called for grape leaves, but the closest thing I have is the oak tree outside my front door. These are fermented pickles, similar to the deli-style dills described above, but fermented for two or three weeks until they are fully sour. They can then be processed for long-term storage. This is a full-flavored, classic dill pickle.

Mustard Pickle: I had my first taste of these this morning because they've been mellowing since I first made them two weeks ago. Again, I wasn't expecting much because they are so easy. But they are devilishly good, with plain white vinegar and a bit of mustard powder. Some readers objected to the tiny bit of artificial sweetener in the recipe. I'm sure you could leave it out. I could easily spend an hour or two with these pickles and a bowl of popcorn. Once processed, they should keep almost forever in the pantry.

Cajun Pickles: You figure with a name like this, they have to be good and they are. They gain heat from ripe cherry peppers and jalapenos from the garden, along with lots of flavor from the many different herbs and spices in the brine. These are another variety of fermented pickle and I just wish the recipe came with a method for canning them so we could put a few quarts away in the pantry. I hate the idea of them going bad before we can eat them all. This is one of those pickles to give to a friend who likes something with a kick.

That wraps up our pickling marathon for now. Seems to me what's missing here is a simple dill pickle made with vinegar for easy canning and storage. With all the references in our cookbook library, we should be able to find one so none of our cucumbers go to waste.

Remember to check your cucumber plants often and well. And may the cucumber fairy bless you plenty.

Friday, August 1, 2008

Hungarian Sun Pickles

Hungarian sun pickles turns out to be cucumbers fermented in a salt brine with flour and a slice of bread. And, yes, they do spend a good amount of time sitting in the sun.

That according to Lucy Norris in her book, "Pickled." Not having grown up with a tradition of Hungarian pickles, I can't dispute Ms. Norris. But I'm still a bit stumped. I didn't do as well as I had hoped in my college microbiology class. Still, I'm pretty sure that the usual salt fermentation process involves a succession of bacteria, whereas bread and flour involve yeast. But Norris insists that "the yeast in (the bread) makes the fermentation process work."

Well, that's why I wanted to try this recipe: to see what happens. (Note: the amount of salt in this brine is much less than what I normally would use for lacto-fermented pickles.)

I ran into the usual problems of trying to match the volume of cucumbers I have on hand with the brining formula presented in the recipe. So I did it backwards. Instead of measuring out ingredients for the brine, I stuffed my container (a 2-quart jar) with cucumbers (2 1/4 pounds) , sliced in half lengthwise. I covered everything with water, then poured the water into a measuring cup to see how much I had.

The original recipe called for 25 to 30 cucumbers 5 inches long (no weight given) and 1 gallon of water to make 1 gallon of pickles. Again I ask, if you are filling a gallon container with a gallon's worth of brine, where's the room for the pickles? Once filled with cucumbers, my 2-quart jar needed just three cups of water. I rounded it off to an even quart to make the rest of the measurements easier.

Pack the cucumbers into the 2-quart jar along with a fist-full of dill weed with seed heads and three cloves of garlic.

Now, for the fun part. The following instructions are designed to allow hot brine to be poured into the pickle jar without cracking the glass.

Stand the filled container in a tall pot with some sort of rack at the bottom (I used my pasta pot with the strainer insert). Fill the pot with warm water to surround the pickling jar (my jar was somewhat taller that my pot, so the jar was not entirely submerged). Gently bring everything up to steaming over moderate heat on the stove. Meanwhile, pour 1 quart cold water into a saucepan and add 1 1/2 tablespoons pickling salt or additive-free sea salt. Heat that until it's steaming as well, the salt completely dissolved. Pour the brine into the pickling jar until the cucumbers are covered by an inch or more.

Use canning tongs or a couple of hot pads to remove the hot jar from the pot. Place it on the counter and sprinkle 1/2 teaspoon flour onto the surface of the brine (no need to stir). Now push a thick slice of yeasty bread, such as sourdough or Jewish rye, onto the top of the brine. (I got a loaf of rye at Whole Foods. I thought that sounded more Hungarian.)

Screw the lid onto the jar and place the jar in a sunny spot outside. You can bring the jar inside at night, but keep putting it out in the sun for four or five days until the cucumbers have fermented to your liking, adding water if needed so the bread doesn't dry out.

When the pickles have fermented, remove the bread and the pickles from the jar and strain the brine through a fine seive. Return the pickles, the dill and the garlic to the jar and cover with the strained brine. Refrigerate. According to Norris, these pickles should last about one week in the refrigerator. My hunch is they will last longer than that. I'm anxious to find out.

Tuesday, July 29, 2008

Cajun Pickles

Sometimes you look at a recipe and instantly know something isn't right.

Take this one for Cajun pickles from a certain book on pickling. At the top of the recipe it says the yield will be four quarts of pickles. But only a few lines lower down it calls for a gallon of water for the brine. A gallon consists of four quarts, right? So if you fill your four quart jars with a gallon of brine, where is there room left for the pickles?

Another issue I have with most pickling recipes is their method of describing quantities for the main ingredient. Often you will see something like, "50 Kirby cucumbers, about the size of your index finger." Well, what if you don't have cucumbers exactly that size? What if you have some that are that size, but others that aren't? What if the only cucumbers you have are the size of your arm? It would make much more sense to give a weight for the cucumbers involved.

Also in this particular recipe there are terms that cry out for definition. For instance, it calls for 1 tablespoon of "Cajun seasoning." Any idea what that is? I was determined not to buy any new spices for these pickles because I already have a closet full. But I checked at the store. The Paul Prudhomme and Emeril spice blends list identical ingredients: salt, paprika, dried onion and garlic. That's easy: I have plenty of salt, paprika, garlic salt and onion powder.

The recipe also calls for "Italian seasoning." Any guesses there? A quick Google search leads to the McCormick blend, which contains marjoram, thyme, rosemary, savory, sage, oregano and basil. Between my spice cabinet and my herb garden I have all of those. But to simplify things, and because these pickles have so many flavors going on already, I paired this down to dried oregano, marjoram and thyme.

Finally, the recipe also includes "pickling spice." I addressed the issue of "pickling spice" in a previous post. This ingredient covers the waterfront and can pretty much include almost anything you want, from mustard and fennel seed to juniper berries, bay leaf and cinnamon. If you think you may have call to use it in the future, you might purchase a pre-made blend at the store. McCormick makes one. Or, make your own using your personal preferences.

In the end, using a little more than 3 pounds of cucumbers I cut the original Cajun pickle recipe by 75 percent and still had enough brine to cover three quarts of pickles. Go figure.

For 3 pounds cucumbers:

1/4 cup pickling salt (or additive-free sea salt)
2 tablespoons distilled white vinegar
1 quart (4 cups) cold water
1/2 teaspoon paprika
1/2 tsp garlic salt
1/2 teaspoon onion powder
1 teaspoon chili powder (I used passilla pepper)
pinch cayenne pepper
1/8 teaspoon cumin
1/2 teaspoon dried oregano
1/2 teaspoon dried marjoram
1/2 teaspoon dried thyme
1 1/2 teaspoon pickling spice
3 cloves garlic, peeled, crushed and minced
3 pounds cucumbers, whole, halved or quartered
3 thin slices red onion
1 small jalapeno pepper, seeded, deveined and cut into thin strips
3 cherry peppers, cut in half, seeded and deveined

Mix the salt, vinegar and water in a non-reactive bowl. Stir until salt is completely dissolved. Add the remaining dry ingredients and mix.

Pack the cucumbers, onion, jalapeno and cherry peppers into three clean quart jars. Pour brine into jars so that cucumbers are completely covered. (If you run out of brine, just top off the jars with a little water, leaving about 1/2 inch headroom.) Screw on lids, tip jars to distribute spices and allow to ferment at room temperature for at least three days, then refrigerate another five days before eating. Alternatively, if you like your pickles more "sour," allow them to ferment longer before placing them in the refrigerator. They should keep several weeks chilled.

Note: The strongest heat in peppers resides in the seeds and the interior veins. I use a paring knife or a melon baller to remove all of this material before placing the peppers in the pickling jars.

Thursday, July 24, 2008

Mustard Pickles

We have spared no effort in our relentless search for the world's best pickles. Meaning, we pulled every book with a pickling recipe from our cookbook library and dove in.

This particular preparation for mustard pickles involves no fermentation or anything even resembling a fermentation, unless you count the soaking overnight in hot water. It comes from a book titled, "Pickled: Preserving a World of Tastes and Traditions," by Lucy Norris. And here you will find more pickling recipes than you could possibly ever use. Some are quite tantalizing. One calls for solarizing cucumbers in a brine with a slice of rye bread. Another is heavy with cajun spices. And there's an intriguing stuffed cucumber kimchi.

I am dubious about some of the quantities called for in the original mustard pickle recipe. It calls for "27 to 29 small Kirby cumbers, about 7 pounds" to fill four pints. Four pints? I'd like to see someone try to stuff seven pounds of cucumber into seven pint jars. My experience calls for something closer to one pound for each pint jar. The original formula also calls for 4 cups of distilled white vinegar for the brine. I halved the recipe and still had plenty of brine left over.

So I am giving my adjusted version:

2 pounds cucumbers, each about 4 inches long (or cut to fit)
4 cups water
2 cups distilled white vinegar
1/8 cup pickling salt, or additive-free sea salt
1 teaspoon powdered mustard
1/8 teaspoon Splenda
1/8 cup sugar

Wash cucumbers, slice into halves, then place in a non-reactive bowl. Bring water to a boil, pour over cucumbers and let sit overnight.

Sterilize two pint canning jars and lids according to manufacturer's instructions. Meanwhile, mix vinegar, salt, mustard, Splenda and sugar. Pack cucumbers into hot jars, then cover with brine, leaving at least 1/4 inch headroom. Screw on lids and process in boiling water for 12 minutes according to manufacturer's instructions.

Store for at least one week before eating. Refrigerate after opening jars. Otherwise, the sealed jars should keep for many months.

Tuesday, July 22, 2008

Oak Leaf Pickles

A number of pickling recipes call for leaves of some sort in the brine--grape leaves, oak leaves, cherry leaves, black currant leaves--on the theory that the leaves make the pickles more crisp.

I have no reason to doubt this is true, so I include the leaves. For these fermented dill pickles, Helen Witty, in "Fancy Pantry," calls for grape leaves. I don't have any grape leaves. But I have an oak tree in front of my house. So I used oak leaves.

This is one of those very simple pickling operations where you cover cucumbers with a salt brine and let them sit in a bucket or a crock for a period of time until they've fermented to your preferred point of doneness. Witty calls these "full sours" because they ferment completely over a period of two or three weeks, depending on the ambient temperature. She recommends checking them daily and skimming away an scum that may form on top of the brine. Testing the pickles periodically is a good idea, because they can very quickly go south if you aren't watching.

Here's Witty's list of ingredients:

24 pickling cucumbers 4 to 6 inches long
8 large fresh grape leaves
large bunch of fresh dill with seeds heads
8 to 12 cloves garlic
6 quarts water
1 cup less 2 tablespoons pickling salt
3 tablespoons mixed pickling spice

I made half the recipe. In fact, I only had nine cucumbers on hand, but I went ahead and halved everything else. That would mean somewhat less than a half cup of salt (I used unadulterated sea salt) for three quarts of water, which is very close to my usual ratio.

Pickling spice? You might be surprised how many different recipes there are for pickling spice. McCormick makes a pickling blend. I decided to try my own:

2 teaspoons yellow mustard seed
1 teaspoon dill seed
1 teaspoon celery seed
1 teaspoon black peppercorns
1 teaspoon allspice berries
1/2 teaspoon fennel seed
1/2 teaspoon cloves
2 bay leaves, broken in half

I used about half of this and saved the rest.

There is nothing complicated about these pickles. First, scrub the cucumbers and set aside. Prepare the brine by combining the water, salt and pickling spices in a large saucepan. Bring the mix to a boil, lower heat and simmer for 5 minutes. Let the brine cool to room temperature (or chill the saucepan in an ice bath).

Layer the grape (or oak, or cherry) leaves, the cucumbers, dill and garlic cloves in a heavy plastic bucket or crock, then cover with the pickling brine. The brine should cover the cucumbers by at least a couple of inches. Cover the cucumbers with a ceramic plate that just fits inside the container and weigh it down with a smaller plastic container filled with water. The cucumbers need to be submerged in the brine at all times to prevent spoilage.

After a few days, check on the cucumbers to make sure they are submerged. Thereafter, check on them daily, tasting occasionally and wiping away any scum that might form, until the pickles are completely sour to your liking.

Now you can eat the pickles straight from the crock or refrigerate them to slow any further fermentation. I'm making mine for canning. Put the cucumbers (whole or divided) with some of the garlic and dill into clean, wide-mouth canning jars. Strain the brine, bring it to a boil and simmer for 2 minutes. Then fill the jars, leaving about 1/4-inch head space. Remove any air bubbles, cover with new canning lids according to manufacturer's instructions and process for 15 minutes in a boiling water bath.

Monday, July 21, 2008

Bread & Butter Pickles

You may be wondering what that milky liquid is my cucumber slices are floating in. That would be "pickling lime," something I drove all the way to the farm supply in Annapolis for a couple of years ago after spending half a day on the telephone trying to find some closer to the District of Columbia.

Apparently, pickling is not a huge pastime here in the nation's capitol. But we are making pickles as fast as we can, trying to keep up with the cucumber plants in our kitchen garden about a mile from the White House.

Do not confuse pickling lime with pickling salt. Pickling lime, also known as "hydrated lime" or "slaked lime," is used to increase crispness. The last time we used it was to make our pickled green tomatoes last fall. It mixes readily with water, but never seems to dissolve completely. You have to stir it occasionally. If you can't find pickling lime in the local hardware store or farm supply, you can easily get it online, along with pickling salt.

My memory of bread and butter pickles is eating them straight from the jar out of the refrigerator, like some kind of candy thief, or in the approved method: with peanut butter and jelly sandwiches at lunch. They were a rare pleasure--I don't know why, perhaps because they were always hidden behind other stuff in the fridge--and stood out because they were cut into rounds with those funny little crinkles. We tried cutting ours with crinkles on the mandoline, but the slices weren't thick enough and tended to fall apart.

This recipe from "Fancy Pantry," by Helen Witty, is supposed to yield six pints. I cut it in half and still wound up with five pints, and used every bit of brine filling the jars at the end.

12 firm pickling cucumbers, 5 to 6 inches long
4 quarts cool water
1 cup pickline lime
1 1/2 quarts cider vinegar
5 to 6 cups sugar, to taste
1 tabespoon pickling salt, or other non-iodized salt
1 tablespoon mustard seed
1 1/2 teaspoons celery seed
1 teasoon turmeric
1 teaspoon whole peppercorns
1/2 teaspoon whole cloves
1/4 teaspoon ground ginger

Scrub cucumbers well and slice cross-wise 1/4-inch thick (I sliced mine closer to 3/8-inch).

Measure water into large bowl (not aluminum) and stir in pickling lime. Add sliced cucumbers, stir, cover and set aside overnight or up to 24 hours, stirring occasionally.

Drain cucumbers in a colander, then return them to rinsed-out bowl and rinse them at least three times in cold water, stirring them to eliminate all traces of pickling lime. Drain again and cover with cool water to a depth of an inch or two. Set aside for 3 hours.

Combine vinegar, sugar, salt, mustard see, celery seed, turmeric, peppercorns, cloves and ground ginger in a saucepan (not aluminum). Heat to boiling, stirring until sugar dissolves, then boil uncovered for 5 minutes.

Meanwhile, drain cucumbers well and return them to bowl. When syrup has boiled 5 minutes, pour it over the cucumber slices. Stir slices gently, then push them under the surface, cover the bowl and set aside overnight.

Transfer cucumbers and syrup to a preserving pan (I used my enameled Dutch oven) and cook everything, covered, over medium-high heat, stirring gently occasionally, until the cucumbers are translucent, about 40 minutes.

Using tongs arrange the pickle slices in 6 hot, clean pint canning jars, leaving about 1/2 inch of headspace. Divide the spices from the syrup among the jars, then add boiling-hot syrup to reach 1/4 inch from the rims. Remove any air bubbles (poking around with a chop stick, for instance) and add more syrup, if necessary. Seal the jars with new two-piece canning lids according to manufacturer's directions and process for 10 minutes in a boiling-water bath. Cool, label and store the jars.

Let the pickles mellow for a month, then chill them before serving.

Thursday, July 17, 2008

Pickles Done

After six days fermenting in a salt brine with garlic and dill my cucumber pickles were done. As you can see, they've lost they're bright green color and have turned a sort of olive. I had been tasting them almost daily since I put them in the brine, and they'd reached just the point doneness I was looking for: pickled, but still crisp.

Quick, I transferred the pickles from the bucket in which they'd been fermenting and moved them to a quart-size plastic container and put them in the refrigerator.

They won't last like this forever. The bacteria, although slowed to a crawl, will continue to munch on them. But for the moment, they are delicious and just a bit crunchy, the kind of pickle you would find at the best Jewish delicatessen. I'm glad we made a small batch, because we will have no problem finishing these pickles before they can go bad. In fact, we are eating some just about every day.

While we are on the subject of pickles, I got out my pickles file and found an article from Washingtonian magazine in which the writer was trying to recreate the pickles once served at Duke Ziebart's restaurant. Duke's was the kind of place where everyone in Washington went to be seen. The food was fairly simple. Apparently the pickles were memorable. Turns out, the recipe the author settled on was very much like the one I used here, except that it included some vinegar in the brine. So when I transferred the pickles into the plastic container, I added a few tablespoons of white wine vinegar, which does mellow the saltiness a little and adds some fruity flavor.

We still have lots of cucumbers and more on the way. In the coming days, we'll be trying a number of different pickling methods. Refrigerator pickles, canned pickles, bread and butter pickles. Do you have any favorite pickling recipes you'd like to share?

Thursday, July 10, 2008

Hidden Pickles

Wouldn't you know it. Just when I was thinking we might never see ripe cucumbers I ran across a bunch of them hiding in the garden.

Cucumbers can be sneaky devils. They don't make a sound. They hide amongst the foliage and if you don't look for them carefully, you won't see them until they're the size of footballs. I got these at just the right moment. The largest is no more than about five inches long. They were way down low where I was trimming the grass along the edge of the cucumber bed. You have to move a few leaves to the side to spot them.

I grow my cucumbers for pickling and there are a couple of issues to consider. First, I don't have many ready to pick yet. I could purchase more at the Whole Foods, but I decided to just use my own and make a small batch. Secondly, my preferred method is to ferment the cucumbers for a deli-style sour pickle. But it's a little warm this time of year. The ideal fermentation temperature is around 68 degrees. I'll just have to find a relatively cool place in the house to stash them.


First I measured enough water to generously cover my pickles and it came to 1 1/2 quarts (six cups). To make "half-sours," I dissolve 3 tablespoons pure sea salt (no additives, or use pickling salt) in the water and pour it into a small plastic food-grade bucket. Add the cucumbers sliced in half lengthwise. Then from the garden I harvested nearly a whole dill plant--the seed head and several branches. I cut these from the stem and added them to the bucket, along with cloves from two heads of our home-grown garlic and about a dozen black peppercorns.


Cover the pickles with a ceramic plate that just fits inside the bucket, and weigh this down with a sealed plastic container filled with water. Cover everything with a clean dish towel to keep the dust out and place the bucket in a dark, cool spot, maybe in the basement.


Check on the pickles in a couple of days. They're done when they taste just right to you, maybe in a week. To stop the fermentation, put the pickles in their brine in the refrigerator. You can also boil the brine to kill the bacteria, then chill it and add the pickles later.


I will be keeping an eye on these and reporting on their progress as time goes by.

Thursday, June 26, 2008

Training Cucumbers

The cucumbers are starting to take flight. Time to get them growing vertically.

Two varieties were planted in a long line with patty pan squash at the far end. Growing them up a trellis is the only way to manage them.


Our trellis is constructed of 1 1/2-inch PVC pipe cut to fit. The pipe and various fittings--elbows, T's--are all available at the local hardware store. You could probably do the same thing much more organically strapping together lengths of thick bamboo.


The poles are supported with lengths of metal electric conduit pounded into the ground. The PVC simply slides over the conduit. To hold the structure in place, clothesline anchors both ends. The one weak point was the joint holding the horizontal pieces together in the middle. I resisted cementing this joint together but found that a strong wind was just as likely to buckle the whole trellis in the middle. Now this very long piece just barely stores in the garage over the winter. The rest of the trellis disassembles easily and can be bundled together when the season is over.

One length of twine is strung horizontally a few inches above the ground between the legs of the trellis. It only takes a few minutes to attach vertical strings corresponding to each plant.

The cucumbers happily attach themselves to the strings. Plan on spending a few minutes each morning giving the plants a little push in the right direction. Eventually this will become a wall of green--and lots of cucumbers for the pickle jar.


Painted black, the trellis is barely visible in the garden. To make sure it doesn't topple over (not a pretty sight), the ends are anchored firmly to the ground with tent stakes.

Tuesday, May 27, 2008

I'll Take Those Three Ibuprofins

Whoever said gardening was easy?

It might not be immediately obvious, but getting our front-yard kitchen garden to look like this took the better part of the Memorial Day weekend. By the end of it, we were grilling burgers and hot dogs and sipping our gin-and-tonics, but I was bushed.

First, I harvested about 10 pounds of various mustard greens and turnip greens and Chinese greens from this bed, blanched the greens and packed them for freezing. Then I applied my usual cultivation approach to the bed--working my forked spade all around to loosen the soil, breaking up the surface with my stirrup hoe, stirring in some compost.

We are transitioning to summer. The bed is now planted with two varieties of pickling cucumbers to grow up trellises on the right, Italian marrow squash in the middle, and three types of radishes in two rows on the left.

The larger part of this bed has been lying fallow for the longest time while the onions, inter-planted with radishes on the right, grow tall. But it was finally time to transplant the tomatoes. Here we have Cherokee Purple, Dr. Carolyn and Big Boy, all comfy in their thick layer of straw mulch.


I had planted Tokyo Bekana greens, dill, arugula and lettuce behind the rhubarb, figuring they would tolerate a little shade. Well, I sort of miscalculated how fast and large the rhubarb would grow. It's very happy in its compost-amended bed. So the other plants never did much except go to seed. But I needed to clear them out of the way to prepare the soil and plant okra. (See yesterday's post.)


This bed was the scene of last year's arugula going to seed. I collected quite a load of seed pods. I'm hoping daughter will help me pick through them to collect the seeds. Then more time spent with the forked spade, the stirrup hoe and hauling buckets of compost from the compost pile before planting more tomatoes: Mortgage Lifter and Green Zebra.

I give the individual tomato plants plenty of room to breathe. They're spaced four feet apart. At the next opportunity, I'll install cages made of concrete reinforcing wire. I plan to plant some zinnias in front of the tomatoes--we always like to have some flowers in the garden--and our collection of peppers and Asian eggplant.

Visible in the far rear is the last bed I renovated for the summer. It's now planted with two Roma tomatoes and a large section of sweet potatoes. This is our first year growing sweet potatoes and I'm anxious to see how they perform in this particular bed. It's situated on the north side of the house, but in summer gets sun in the morning and late afternoon.

Yikes...just writing about all this work makes me hungry for another Ibuprofin.

Friday, October 12, 2007

Cucumbers Are Slippery

One of the ideas I like to introduce to the kids in my "food appreciation" classes is that good food doesn't always have to be cooked. I also like to show them how people used preserve food so they would have good things to eat all year 'round.


That leads me into the subject of cucumbers, because they're delicious raw as well as pickled. So this week we made a cucumber salad as well as starting two buckets of pickles.

This is one of those lesson I like on multiple levels. Not only does the food lend itself to teaching about freshness and preserving, we also get to practice some of our basic kitchen skills, such as peeling and slicing. And we can do some math along the way as well.


First we take two large cucumbers and I slice them crosswise into two pieces. That makes four, which I distribute among the class. The kids then take turns peeling the cucumber halves. This is not as easy as it sounds. Many of the children are still learning how to peel. They whack at the cucumbers or whittle away furiously. Several times I demonstrate how to hold the peeler correctly against the cucumber, and peel away the dark skin only in slow, methodical strokes.

When the peeling is finished, I slice the four cucumber pieces in half lengthwise. Now we have eight pieces. Again I distribute the pieces among the kids and they use spoons to scoop out the seeds. Some kids say they like the seeds. But I think the seeds are bitter and not worth eating. So we remove them. Now we have eight little cucumber boats.


For the final step, I bring out the mandolin. We used the mandolin the previous week to slice zucchini, so the kids know what it is and are excited to see it again. We take turns slicing the cucumber boats into thin crescent shapes, learning how to hold the vegetables properly so that certain parts of the fingers aren't sliced off in the process. When we're done, we have quite a pile of thinly sliced cucumber.

I put the cucumber slices in a cucumber bowl to make the simplest possible cucumber salad. Kids love sugar and salt. To dress the cucumber, we simply sprinkle on a little kosher salt, toss, then season it lightly with a splash of distilled vinegar.

Some of the kids think the salad would be good with extra-virgin olive oil or ground pepper. And of course you could use a flavored vinegar, dill weed, even cream for a Scandinavian-style cucumber salad. But we're just going to put our cucumbers away to marinate for a few minutes while we assemble our pickles.


Along with the slicing cucumbers I've brought several pounds of pickling cucumbers from Whole Foods. The pickling process is so simple, and I've mentioned it here a number of times. Cucumbers go into a heavy plastic bucket with salted water, mixed six tablespoons of pickling or unadulterated sea salt to one gallon of water. We then add generous amounts of dill weed and garlic cloves.


The kids have been asking ever since school started whether we would be making pickles again. So here we are. They get to plunk cucumbers into the bucket, then we have a short math quiz: If we have a two-quart measuring cup filled with water, how many gallons is that? And if we make half our recipe, how many tablespoons of salt do we need for one half a gallon?


(It isn't till grade four that the kids start to shout out the answer. The younger kids just stare at me.)


We add the water and the other ingredients to the cucumbers, place a ceramic plate over them, weigh the plate down with a plastic container full of water, then cover the whole thing with a kitchen towel to keep dirt out. The bucket will sit in a corner till next week, when the pickles should be ready to place in jars and refrigerate.


Now, to eat our cucumber salad. The kids are definitely more enthusiastic than they were with my zucchini carpaccio with goat cheese the week before. They take up their plastic forks with relish. And I would say most of the kids finish the salad, but there are still a fair number who just don't like these green vegetables.


Could it be time for a vegetable soup?

Friday, August 17, 2007

Pickling Like Mad

I have a confession to make about last year's pickles.


I don't think they were that great. We made quite a large quantity for my "food appreciation" classes at the private elementary school where I teach here in the District of Columbia. The kids were wild for them and we served them at the parents' night dinner. Some of the parents even requested jars to take home.


The pickles were okay. But they were missing a certain zip. This year, I'm pleased to announce, we've got the zip.


These are fermented pickles, meaning they cure in a salt brine and when finished resemble those "kosher dills" you remember being served with your pastrami sandwich at the Jewish deli. I may be halfway over the learning curve because I've become rather adept at stopping the fermentation process at just that point when the pickles have absorbed the garlic and dill flavors and still retain the bright fresh color and the crunchy cucumber snap.


Some people call these "half-sours."


If you let the cukes ferment much longer, they turn a deep, dark green and become somewhat softer--not completely flaccid, mind you, but somewhat beyond snappy--more like the standard dill pickles you find in a jar at the supermarket. These would be "full-sours."


Not fermented enough and the pickles are missing the proper flavor and aren't cured all the way through--they taste more like salad.

Somehow, August doesn't feel like pickling season and with the temperatures this high, the fermentation process moves right along, more quickly than it might in the fall when things are cooler. But this is when the cucumbers are ripe for picking. You can't let them sit around and go bad, so into the brine they go.


At current temperatures, the pickles seem to reach the proper flavor and consistency for my taste somewhere between five days and a week in the brine. At this point, they need to be refrigerated to stop the bacterial action and arrest the fermentation process until you are ready to eat them.


(Remember the formula for making these pickles? Dissolve six tablespoons pickling or fine sea salt in one gallon of water. Add peeled cloves from two heads of garlic, a couple of dill plant seed heads if you have them, a fistful of leafy dill sprigs, another fist full of oak leaves and maybe a half-teaspoon of red pepper flakes. Place all this and the cucumbers in a heavy-gauge plastic bucket. Cover with a ceramic plate that fits just inside the bucket and weigh this down with a plastic container filled with water to keep the cucumbers completely submerged in the brine. Place the bucket in a cool, dark spot and check on the pickles after a few days. Skim away any mold that might form and watch the pickles carefully so that you stop the fermentation when they reach your desired doneness.)


I've made several buckets of pickles recently and yesterday was the designated day to put them away for storage. Even the cukes that had grown very large on the vine while we were on vacation pickled to a crispy, garlicky turn. I cut the cukes in half lengthwise, then cut these pieces in half and sliced them into spears to fit quart-sized plastic containers. Add a few garlic cloves, some dill stems and top off with brine. Then place the containers in the fridge.


I also saved a large container of brine, in case the pickles need to be topped off at some point in the future. Unfortunately, I cannot tell you how long these pickles will keep in the refrigerator. I just don't have enough experience with them, and I'm not sure they won't be eaten well before they expire. But judging from the fermented sauerkraut I made last December, which remains delicious in the fridge to this day (note to self: eat more sauerkraut), these pickles should keep for a good long while.


I couldn't help munching on the pickles as I worked, they are that good. Pretty irresistible, in fact. I was pining for that pastami sandwich. I would have settled for tuna fish.

Some batches turned out better than others, meaning I just have to keep a closer eye on things next time. My cucumber plants are exhausted at this point. Fortunately, you can buy pickling cucumbers at the farmer's market or the Whole Foods and, unlike mine, they will be about the right size for canning, not the monsters I've been using. So I will be making some mean pickles with my "food appreciation" students this year.


Now, to find a recipe for that pastrami...

Thursday, August 16, 2007

Potato Harvest

My garden journal tells me it was May 1 that I planted my bed of cucumbers, onions and Italian "striata" squash. I also planted edamame, or soy beans, for the first time. We pulled those plants weeks ago and blanched the beans, freezing most of them for later.


Yesterday was time to dig up the rest of the bed and start thinking about a fall or winter crop. I sank the forked spade into the soil and started lifting around the weeds. Up came onions I had not seen--set those aside. Out came the squash plants--they are sprouting new leaves and blossoms, but really they've done their job. The cucumbers are looking tired as well. I've trained them to grow up strands of butcher's twine hung from a PVC frame. I'll let the few remaining fruits grow a few more days. Then it will be their turn to contribute to the compost pile.


As I turn the soil, I see the remnants of the layer of straw I laid down three months ago to hold back weeds. The straw is half-rotted, telling me I'm not alone here. The soil is teeming with micro-organisms munching away on the organic matter. They give the soil that fresh, fecund aroma that can only be described as "earthy." That is a sign of a healthy soil that is getting healthier all the time. The bacteria and fungi and nematodes and other creatures--all too small to be visible, but numbering in the billions--are the real workers here, breaking down matter into molecular bits, releasing nutrients and feeding my plants in the process. I am just a walk-on player, the guy who comes along and stage-manages.


In the end, this is where food comes from, that part of an endless cycle of birth, death and decay where we get to interject, gathering what the good earth offers so that we, too, can play in the cycle.


This is the second day of full-on harvest from our front yard garden here in the District of Columbia, about a mile from the White House. I am not trying to invent anything new by way of cuisine, not trotting out any fancy recipes. We are just eating from what we have sown, food simply and efficiently prepared in all its freshness and fullness of flavor.


In another bed we planted more than two dozen potato sets. The plants have since faded. You'd be hard-pressed to know they were ever here. But when I turn the earth something magical occurs--along with the clods of soil perfectly formed red and purple potatoes appear. There's a bit of searching that goes on. Did the first spade-full turn up all the potatoes? Or are there more down there--deeper, deeper--waiting to be discovered? I sift through the soil with my hands, breaking clods apart, and quickly have a bowl full or potatoes. We wash and scrub them, cut them into pieces, toss them with extra-virgin olive oil, salt, pepper and roast them in a 325 degree oven until tender.


We love Swiss chard and it thrives in our garden. Do we have the perfect conditions for Swiss chard here, or is it really so easy to grow? I don't know. I am always tempted to plant more and more of it. We even had a couple of volunteers this year. They came up in the flower bed, where I'd sown tansy and coreopsis. So it was the volunteers I harvested first, gathering the stalks in one hand, then cutting them close to the soil with a serrated knife.


Most recipes focus on the leaves of the chard, something I don't quite understand. The tastiest parts are the stems. After washing them, I roll the stems and leaves on a cutting board and chop everything roughly into pieces. This will make a large pile. I toss these into a heavy skilled where I've been sauteeing sweet onion in extra-virgin olive oil, a bit of chard at a time, since all of it would never fit in the skillet. Place a handful of leafy chard into the skillet with a bit of water, cover the skillet for a minute to let the chard cook down and reduce in size. Then add more chard until the whole pile is in the skillet, simmering.


Season with salt and pepper and continue cooking gently until the stem parts are tender, about 30 minutes. If you are using red chard, the stems will be much paler now. When they are cooked, I like to add about a tablespoon of pomegranate molasses (available in Middle Eastern groceries), a sprinkle of sugar and a splash of red wine vinegar. All of these flavors mingle well with the earthy tartness of the chard.


Finally we had some cucumber to make a salad. I planted cucumbers mostly for pickling. But when you leave your garden to go on vacation, cucumbers will grow out of control. Some of the cuckes grow to the size of small torpedoes. They turn a light orange color at that point--like a squash--but they are still perfectly edible. I peel them, cut them in half lengthwise and scoop out the seeds. Then I slice the two halves thinly on the mandoline.


Place the half-moon slices in a colander set over a large bowl. Season the cucumber generously with kosher salt and refrigerate for a couple of hours or overnight. The salt will draw out much of the water. I now dress the cucumber slices very simply with white vinegar and finely chopped dill. You could also add a bit of heavy cream to make a finished salad.


When everything was finished--prepared simply, mind you, no fussing--we sat down for another dinner out of the garden. The flavors were bright and strong, the food could hardly be fresher. And of course we were feeling proud and satisfied, having grown it all right outside our front door.

Wednesday, July 11, 2007

Uncle Moyshe's Fresh Pickles

The headline for today's post is a bit deceptive, in that I don't have an Uncle Moyshe. But I imagine if I did have an Uncle Moyshe and he made pickles, they would be very much like these.


Because these are not canned pickles, but pickles that ferment in a salt brine. These would be the kind of pickles you would find floating around in a big barrel in an old-fashioned Jewish delicatessen. Or maybe sidling up next to your hot pastrami sandwich.

Some of the cucumber vines we planted are beginning to bear fruit. I specifically planted pickling cucumbers because, to be honest, we're not huge fans of slicing cucumbers. I enjoy Swedish-style cucumbers, the ones sliced incredibly thin and dressed simply with salt or perhaps a cream sauce. Otherwise I eat most of my cucumbers in some form of pickle.


Another important reason for making pickles is the chance to re-visit Sandor Ellix Katz and his book Wild Fermentation. Opening Katz' book is like going home again, with all the unusual recipes for fermenting one kind of vegetable or another using simple home brews. I never feel more liberated as a cook, or more self-sufficient as a human, as when I am following one of Katz's recipes. Fermentation has a way of making a connection with our deepest roots as cooks and eaters.

Another advantage: fermentation involves no cooking that might heat up the kitchen on an already hot July afternoon.

I cheated a little because I really only had three cucumbers ready for pickling, it's still that early in the season. But I couldn't see letting them go to waste while we wait for more cucumbers to grow on the vine. So I just buzzed down to the local Whole Foods and bought some more pickling cucumbers to augment my own. It's a nice feature, Whole Foods selling pickling cucumbers. (Those are the ones with the little bumps all over, as opposed to the smooth slicing cucumbers.)

I had to adjust the standard pickling recipe, which calls for covering the cucumbers with a brine of salt and water. Instead of measuring the water for the brine, I laid the cucumbers in the bottom of my pickling bucket (a 2 1/2-gallon plastic bucket purchased from the corner paint store), then covered the cucumbers with water, then measured the water.

What I had was 3 quarts of water, which, when adjusted according to Katz's formula, called for 4 1/2 tablespoons of pickling salt. I mixed the salt with the water. To the bucket I added several small dill seed heads from the garden, along with a fistful of dill stems with bushy leaves and the peeled cloves from two heads of garlic and several oak leaves. Yes, that's correct--oak leaves gathered from a tree in front of the house. They, or the tannins the leaves contain, help crisp the pickles.

Finally, I added about 1/2 teaspoon red pepper flakes for a little heat, then covered the pickles with a small plate that just fits inside the pickling bucket. On top of the plate I placed a plastic storage container filled with water. This will keep the cucumbers submerged in the brine.

The way fermentation works, a progression of different bacteria will colonize the brine, eventually creating lactic acid in which beneficial bacteria will thrive while keeping spoiling kinds of creatures out.

The process can take anywhere from a week to a month, depending on temperature. The higher the temperature, the faster the fermentation. I prefer a slow, gentle fermentation. The good bacteria like things around 70 degrees, but it's not easy finding a 70-degree spot in our house, since we don't crank up our air conditioning that high, even when it's pushing 100 degrees in the District of Columbia, as it is now.

I covered the pickling bucket with a clean dish towel and placed it in the stairwell leading down to our garage. It's cooler down there.

With any luck, I won't forget to check on our pickles periodically. When they reach that perfect, puckery peak of pickleness, I will remove the bucket from the stairwell and place the pickles in the refrigerator where they will keep for a good long while.

Now we just have to figure out how to make our own pastrami...