Showing posts with label salad. Show all posts

Wednesday, February 18, 2009

Overwintered Carrot Salad

When you've got carrots, make carrot salad.

We pulled about five pounds of carrots from the garden the other day, just getting ready for spring planting. Some of those carrots were roasted with parsnips. I turned some more into one of my favorite salads with dried fruits, nuts and a curry dressing.


This salad is so adaptable. I usually throw in some raisins and walnuts, but what I found in the pantry were dried cranberries and sunflower seeds. You could use almost anything.


For the dressing I like to mix mayonnaise with a mild vinegar such as rice vinegar. I was out of that, too. So I substituted champagne vinegar. Instead of sweetening it with sugar, I used mirin, the traditional Japanese sweet condiment.


Grate five medium-sized carrots to make about 3 cups (I use the large holes on my box grater). Add about 1/2 cup raisins or dried cranberries and 1/3 cup chopped walnuts or sunflower seeds.


In a separate bowl, mix 1/2 cup mayonnaise with 1/4 cup rice vinegar, 1 tablespoon mirin (or substitute your favorite sweetener to taste), 1 tablespoon extra-virgin olive oil, 2 teaspoons curry powder, 1/2 teaspoon salt and freshly ground black pepper to taste. Whisk until smooth and adjust seasonings.


Stir just enough dressing into the carrot mix to coat. Serve at room temperature or slightly chilled. This salad will brighten up a casual dinner or a lunch next to a sandwich. I confess: I can't help snacking on it till it's gone.

Monday, September 29, 2008

Lunch

Tuna and chickpea salad with golden cherry tomatoes.

Preparation time: 10 minutes

Shopping: none

This salad was tossed together with a can of tuna from the pantry, an opened can of chickpeas in the fridge, a few slices of red onion and some Dr. Carolyn tomatoes from the garden. It was displayed on this week's green salad mix already bagged in the refrigerator and dressed with the simple mustard vinaigrette we had on hand.

I also like this salad with the giant marinated white beans usually available in the cheese section at the local Whole Foods. (They used to be displayed at the olive station, but then showed up prepacked with the fresh mozzarella cheeses. Last I checked, they were sold out--hopefully this is not another one of those outstanding items Whole Foods quietly removes from the shelves.)

What is most intriguing to me about this dish, however, is the canned tuna. I buy a water-packed white albacore tuna labeled as "U.S. wild-caught." Since the dolphin controversy and the warnings about mercury content, there hasn't been much news about canned tuna, so I turned to the Monterey Bay Aquarium's "Seafood Watch" site for an update.

Perhaps more than most fish, tuna is a quagmire for anyone trying to purchase sustainable seafood. Starting with albacore, for instance, "Seafood Watch" pronounces Tombo, canned white tuna, longfin Tunny and Albacora a "best choice" if it's caught off British Columbia or the U.S., and if it's caught by trolling or with a pole. Also, the same varieties are a "best choice" if caught in Hawaiian waters by trolling, with a poll or with a handline. However, those vary same varieties caught in Hawaii using the "longline" method are merely a "good alternative."

The trouble with albacore starts when you get into those same varieties using those same methods "worldwide" (except Hawaii). In the case of "worldwide," you should avoid that can of albacore.

As for Skipjack tuna, including Aku, "Canned Light Tuna," Arctic Bonito and Striped tuna, the "best" choice is either "worldwide" caught trolling or with a poll, or from Hawaii caught trolling, with a poll or with a handline. Again, a "good alternative" is from the same varieties caught near Hawaii using the "longline" method. To be avoided are the "imported" varieties using the longline method.

No misunderstanding there, right?

Unfortunately, I don't think much of this information is listed on the cans available for inspection at the local grocery store, including the Whole Foods, which has numerous varieties available in a wide range of prices. Once again, it's buyer beware.

Tuesday, July 22, 2008

Lunch

Plate of leftover salads: beet and tomatoes, corn salad.

Preparation time: 5 minutes

Shopping: none

We never tire of having a container of our beet salad in the refrigerator. Fresh beets from the garden, tomatoes and red onion seasoned with extra-virgin olive oil and red wine vinegar is big on flavor and utterly refreshing, especially chilled. Next to that is a simple corn salad with many of the same ingredients, plus cilantro. I could easily add to that some of the jalapeno growing in the garden. We've had some in fresh salsa and the flavor is explosive--so fruity and aromatic, and no salmonella.

Tuesday, June 24, 2008

Barley Salad with Onion Scapes, Marjoram and Feta

There are endless possibilities for mixing and matching ingredients with whole grains to create dynamite salads and pilafs.

Barley is often overlooked and that's a shame. It's full of nutrition and has the most agreeable chewy texture that I love to bite into. As if that weren't enough of a recommendation, it is ridiculously inexpensive purchased in the bulk section.

Our local Whole Foods now carries two types of barley in bulk. One is the traditional pearled barley that you see here. The second is called "hulled" barley, which actually is more of a whole grain than the pearled variety.

"Hulled" barley, with a longer, narrower shape, has just the outermost and toughest hull removed. The bran, full of fiber and vitamins, is left intact. Pearled barley, by contrast, is processed to remove all of the hull and the bran, leaving it with that bright, pearly white finish.

"Hulled" barley takes a bit longer to cook and has a chewier texture. Since I already had some pearled barley in the pantry, that's what I chose to use for this dish.

To make the salad, I cooked 3/4-cup dried barley in 1 1/2 cups lightly salted water until tender. I spread the cooked barley on a baking sheet to cool. Meanwhile, chop one long onion scape from the garden into small pieces and toss it in a mixing bowl with about 1/4 cup marinated black olives, pitted and coarsely chopped, a big handful of cherry tomatoes, cut into quarters, a couple of ounces Feta cheese, crumbled, and a couple teaspoons coarsely chopped marjoram leaves fresh from the garden.

Marjoram is a close cousin of oregano but the leaves are smaller and sweeter. It's used quite a bit in making sausages and also in some stews and pasta sauces. I like its pungent, assertive flavor. But if you can't find it, you could easily substitute oregano or even torn basil leaves for a very different twist.

To season the salad, I made a quick vinaigrette from 1 teaspoon Dijon mustard, a tablespoon red wine vinegar and a couple tablespoons extra-virgin olive oil. Toss the vinaigrette into the salad and season with coarse salt and freshly ground black pepper.

Note: if you don't happen to have onion or garlic scapes growing in your garden, feel free to substitute chopped scallions.

Thursday, June 12, 2008

Lunch

Salad greens from the garden with grated carrot, cherry tomatoes and leftover hard-boiled egg.

Preparation time: 10 minutes

Shopping: none

Season with extra-virgin olive oil, white wine vinegar, a little salt, freshly ground black pepper.

Here's a question: Why are brown eggs more expensive in the grocery store than plain white eggs? The only difference between brown eggs and white eggs is that brown eggs are laid by brown chickens. My wife thinks this is simply a marketing scam perpetrated by the egg industry. Usually, we buy our eggs from a local farmer.

What do you think?

Thursday, May 29, 2008

Kids Make New Potato Salad with Onion Scapes

The inspiration for this potato salad came from our recent garden cleanup. Where I wanted to plant okra, potatoes were growing, apparently from spuds I had missed during last year's harvest.

I dug up the new plants (hated to do it) and in the process gathered a bucket-full of potatoes. Could they possibly be edible? I put them on the stove in a pot of water. The result was not too bad at all, but I thought they looked a little long in the tooth. That was easily solved with a mayonnaise dressing. And for a bit of green, I tossed in a handful of chopped onion scapes, those being the long flower stems I had recently snipped from our onion bed.

My wife doesn't care for mayonnaise dressing or hard-boiled eggs in her potato salad, so this was not to her taste at all. And when I decided to bring the recipe to school for our "food appreciation" classes, I got the baby red potatoes at Whole Foods, making this more of a seasonal dish. If you don't happen to have onion or garlic scapes handy, use chives.

Kids are always eager to cut things like potatoes and celery. It's not easy with their plastic knives, but they were not deterred.

2 pounds small boiling potatoes

3 hard-boiled eggs

2 celery stalks, cleaned, trimmed and diced small

1/4 yellow onion, diced small

2 tablespoons chopped onion or garlic scapes (or substitute chopped chives)

1/3 cup mayonnaise

1 tablespoon Dijon mustard

1 tablespoon cider vinegar

1/2 teaspoon salt

Cut the potatoes into bit-size pieces and cook until just tender in a large pot of salted water. Drain potatoes and chill in cold water. Drain potatoes again, then transfer to a large mixing bowl.

Peel the eggs and chop into bite-size pieces. Add eggs to potatoes, along with celery, onion and scapes (or chives). In a separate bowl, mix mayonnaise, mustard, vinegar and salt. Pour dressing over the salad and toss well. Serve at room temp.

The finished salad is a classic side dish for a barbecue or picnic. Many of the younger kids in our classes were put off by the idea of eggs and potatoes together, but the older kids wolfed it down and begged for seconds.

Thursday, May 22, 2008

Kids Make Carrot Salad with Toasted Soy Nuts and Asian Flavors

Here's a lesson in how guacamole turns into carrot salad.

I had every intention of showing the kids in my "food appreciation" classes how to make a classic guacamole. The plan was to use some of the ripe avocados that have been on prominent display at the local Whole Foods lo these past few weeks. But of course when I arrived at the Whole Foods to purchase the ripe avocados--oh, maybe an hour before class was scheduled to begin--that big display of avocados had completely disappeared, replaced by a new display of utterly green and rock-hard avocados usable maybe next week.

Quick! Think of something seasonal, something we can make in less than an hour! I scanned the produce department and my eyes landed on carrots. Carrots have many virtues, one of them being they don't have to be cooked to be good. They also get the kids involved in peeling and grating. So a carrot salad seemed the logical choice.

As the idea of a carrot salad began to take shape, I decided this would also be a good opportunity to find some sort of substitute for the walnuts I normally put in my carrot salad. We don't use nuts at school because of allergies, and I've been talking with the kids lately about things we might use to add a healthful crunch to our dishes that won't send anyone to the hospital. A visit to the bulk section turned up toasted soy nuts. To be honest, I have never used toasted soy nuts before. This was good a time as any.

I had already planned to use lemon in the salad, then started to lean Asian because I like the way lemon and rice vinegar go together. I picked up a bottle of mirin, to add sweetness. And when I arrived at school and scanned the contents of our pantry, I found a wee bit of toasted sesame oil in the cupboard. From there we tentatively improvised our carrot salad dressing, measuring some of this and some of that, and finally tossed it all together.

1 pound carrots, peeled and grated
1/2 cup toasted and salted soy nuts
1/2 cup black raisins
1/3 cup mayonnaise
1 tablespoon lemon juice
1 tablespoon rice vinegar
2 teaspoons mirin
1 teaspoon toasted sesame oil
1/2 teaspoon salt

Toss carrots, soy nuts and raisins in a bowl. In a separate bowl, whisk together mayonnaise, lemon juice, rice vinegar, mirin, sesame oil and salt. Pour dressing into carrot mix and toss thoroughly. Serve room temperature or slightly chilled.

Note: Mirin is a classic condiment and seasoning in Japanese cuisine, typically sold in the Asian section of most supermarkets. It is very sweet, and usually contains alcohol. The version we used contains 8 percent alcohol.

Thursday, May 15, 2008

Kids Make Fava & Pea Salad with Roasted Garlic Vinaigrette

Sometimes I am completely surprised by what the kids in my "food appreciation" classes find delicious. I wasn't sure at all about this particular dish--a salad of fava beans, peas and asparagus--because it is just so darn green. In addition, I was betting the kids had never heard of fava beans and might very well reject them, even though they are among my favorite foods.

In fact, there were several different elements in this lesson competing for attention. First was some background on favas, since they are the original old world bean, unlike virtually every other bean in the world, which traces its lineage back to the Americas. There is also the strange little casing from which the fava must be liberated before it can be consumed.

We also had asparagus spears that needed to be cut in a decorative fashion for our salad. And then came the matter of a vinaigrette that starts with roasted garlic. For this I introduced the kids to parchment paper, an easily overlooked but extremely handy kitchen supply that gives rise to its own cooking technique: oven steaming. I showed the kids how to slice the top off a whole head of garlic, drizzle it with olive oil, then wrap it in parchment paper, and again in aluminum foil for roasting in the oven.


I've always purchased my favas frozen at the local Latin store. The tender, sweet bean is encased in a tough shell. Defrost the beans in a pot of boiling water, drain and chill in cold water. If you make a slit at one end of the shell with a paring knife, the bean slides right out. One of the students preferred prying the shell open with his fingers. To each his own.


I now find shelled favas in the frozen section of the local Whole Foods. This eliminates a lot of work. For the salad, we found that 1 1/2 cups each (about 8 ounces) of favas and frozen peas, plus 1 pound of fresh asparagus trimmed and cut on an angle into 1/2-inch pieces, then cooked until tender, made enough for at least a dozen snack-size portions. Cut this recipe in half to make four adult-sized dinner portions.

To defrost the favas and peas, we simply combined them in a bowl and covered them with hot water for a minute or two.

Roast the garlic in its parchment-foil packet ahead of time in a 350-degree oven for one hour, then give it a chance to cool. When it comes time to make the vinaigrette, squeeze the garlic like toothpaste out of its paper skin into a mixing bowl. Kids love the smell of roasted garlic, but they weren't quite sure what to make of the squishy, caramelized puree that emerged.

"Ew!" they exclaimed. "It looks like poop!"


When roasted like this, garlic is completely transformed--it loses all its agressive tendencies and becomes very mild, even sweet.


Use a whisk to blend 1 1/2 tablespoons red wine vinegar and a drop or two of extra-virgin olive oil into the garlic puree. When the oil is completely incorporated, mix in another 1/3 cup. Season with salt to taste. At this point, I would normally add about 1/2 cup toasted walnuts, coarsely chopped. But we don't do nuts at school because of allergies. One alternative might be the toasted roasted soy beans you sometimes find in the bulk section. One of the students suggested water chestnuts to give the salad a little crunch.


Toss the salad with vinaigrette, chopped parsley, some crumbled Feta cheese and serve at room temperature. The kids gave this dish a big thumbs-up. It would make an excellent side for a spring picnic.

Tuesday, April 22, 2008

We're in The Washington Post

The Washington Post this weekend ran a feature in its Sunday Source section on gardening in containers. They asked me, the kitchen gardener, to come up with a design for for an edible container scheme.

Gardening in containers is a great idea if you are short of space or want to be able to move your plants from one place to another. And if you can grow it in the ground, you can grow it in a pot. You can have an entire salad garden on your back deck. Containers are also good for tender plants that need to be taken in during the winter.

The Post reporter interviewed me for almost an hour on a range of gardening issues. You won't find much of that in the text, although several experts weigh in with good advice.

The one item we took strong exception to was the advice to feed container plants with a certain commercial product containing artificial fertilizers. We don't use artificial fertilizers, preferring things like compost, fish emulsion or alfalfa meal. Also peat moss, most of it harvested in bogs in Canada, is considered an unsustainable product. Look for potting mixes that contain alternatives.

Once you get to the story, you can find my container design by clicking on "Tailor-Made Gardens," then choose number 2. Take a look at all the designs. They're all very interesting. The reporter, Dan Zack, spent a lot of time on this and did a good job.

Friday, April 18, 2008

Teaching Teachers to Make Salad

Since building a large container garden at my daughter's charter school two years ago I've been involved in teaching kids how to prepare fresh produce as well as working with an organization that helps other teachers start gardens at their own schools.

School gardens expose children to healthy, locally grown food and can be used to teach all sorts of skills, including science, reading, math and art. But getting school gardens off the ground and maintaining them present a number of challenges. Not least of these is the fact that most schools are on vacation during the summer, the peak growing season in most areas of the country.

That's why I emphasize salad and other greens in the school gardening scheme. Cool weather crops such as leaf lettuce, arugula, mizuna, cress and mache can be planted in March or April and harvested before the school year is over. To those you can add radishes and carrots. The carrots might not be ready till fall. Or, in our case, you can plant carrots in the fall and be harvesting them in spring. Fall is a good time to plant a second round of salad.

Yesterday was our annual teacher workshop with D.C. Schoolyard Greening, the organization I work with. I presided over the salad clinic, where I gave my best pitch for growing salads and also passed along some of the lessons I've learned working with groups of children.

* Avoid taking large groups of children into the garden by yourself. Focus and control become issues when kids are released to the outdoors. I try to have at least one other adult with me, and work with two or three kids at a time planting seeds or harvesting. There need to be specific rules of behavior in the garden.

* Kids love harvesting and preparing vegetables. Planting seeds takes no more than a few minutes. But you can occupy children for hours turning lettuce into salad. They will fight for a chance to wash the lettuce and crank it dry in the salad spinner. I prefer to plant leaf lettuces rather than heading lettuces. Leaf lettuces grow fast, and they produce more leaves when you cut them.

* Teach kids basic kitchen safety. An important lesson is placing a kitchen towel under the cutting board to keep it from moving. An unstable cutting surface leads to injuries.

* Young children in my classes use plastic knives, which are good enough to cut things like carrots and radishes. But vegetables should lie flat for cutting. Chasing a radish around the cutting board is dangerous. Instead, cut it in half lengthwise to create a flat surface. It can then be sliced without moving. I usually slice carrots into sticks before giving them to children to cut into dice.

* Kids love working with simple tools. They will occupy themselves for hours with a vegetable peeler or a box grater. To peel a carrot, I teach them to work on one half of the carrot first, then flip the carrot around to peel the other half. This makes the work go faster and reduces the risk of fingertips getting cut.

* Making vinaigrette is a good way to teach fractions as well as the concept of an emulsion. A classic vinaigrette consists of three parts oil to one part vinegar. Here's a simple recipe for a honey-mustard vinaigrette:

1 teaspoon Dijon mustard
1 teaspoon honey
generous pinch coarse salt
pinch ground pepper
1 tablespoon white wine vinegar
3 tablespoons extra-virgin olive oil

In a bowl, whisk together mustard, honey, salt, pepper and vinegar. Add a drop or two of olive oil and whisk vigorously until the olive oil is completely incorporated. Add remaining olive oil and whisk until vinaigrette is smooth and homogeneous. Taste and adjust seasonings as needed. If it seems too sharp, whisk in more olive oil.

Pass the bowl around so the kids can take turns using the whisk. They will not tire of it. Pretty soon you will have kids loving the salad they made themselves.

Friday, March 21, 2008

Dark Days: Beet Salad with Arugula and Pickled Red Onion

Our recent beet harvest yielded about seven pounds, but since these beets were first planted last August I was anxious to see if they were actually edible.

The beet greens, braised with garlic, shallots and red wine, yielded a delicious lunch earlier in the week. I cooked the beets yesterday in batches in a large pot of water, leaving the root and some of the stem intact.

From the boiling water they went directly into a cold water bath. The skins slipped off easily. I cut the beets into wedges. Now to taste.

The verdict? Not bad. A wee bit chewier than you would normally hope, but sweet and quite edible, especially for beets that had been in the ground for seven months. We are learning lots lately about how things overwinter in our kitchen garden here in the District of Columbia.

We decided these beets would be good candidates for pickling, but I put a few aside for dinner. I made quick pickles of some red onions. (See below). I tossed the beets and pickled onions with overwintered arugula from the garden and some blue goat's milk cheese, then dressed everything with a simple honey-mustard vinaigrette.

Now that spring is here, the arugula is desperate to go to seed. The seed stems seem to rise overnight. But that's fine with us. Along with the peppery leaves, the buds and flowers are great for spicing up a salad.

To pickle a batch of red onions, peel and cut two red onions in half lengthwise, then slice the halves into thin crescents. Put these in a bowl and cover with four cups of boiling water. Let stand 5 to 10 minutes, then drain in a colander.

In the same bowl, mix together a marinade of 1/2 cup cider vinegar, 1/2 cup water, two tablespoons honey, 1 teaspoon black peppercorns and 1 teaspoon whole cloves. Return the onions to the bowl, mix and let stand for about 4 hours, tossing the onions in the marinade occasionally.

The onions are best chilled before using. Or pack them into 2 pint-sized canning jars with the marinade and store in the refrigerator.

Monday, March 17, 2008

Overwintered Salad

Something inspirational is happening in the garden. The many greens I like to put in my salads have shaken off their winter stupor and our bounding back into a new season. As they revive, we begin picking again, putting a healthy assortment of greens on the dinner table.

Mustard greens are great for cooking. But if the leaves are picked while still young and tender, they make a great addition to a salad. I particularly like this red mustard for the rich color it adds to the salad bowl.

You may be getting the idea that I like sharp flavors in my salad. In fact, I love sharp peppery greens even as just an accent in an otherwise mild salad. Mizuna is one of my favorites. Its frilly foliage looks great in the garden as well.


I never seem to have enough arugula seed on hand. I don't ever want to be without arugula. It has a robust, spicy flavor and a great chew. Sometimes I just dress it with a little lemon and extra-virgin olive oil and eat it all on its own.


We even have some lettuces making a comeback. This "Red Summer Crisp," one of about 15 different lettuce varieties I planted last year, seems to be particularly determined to carry on. Before long, though, it's bound to go to seed.

Sorrel is a perennial. It loves these cool, early spring days. Its citrusy flavor is great in a sauce for fish, blended into a pesto or just torn up for a salad. Kids love to pick it right out of the garden.


Cilantro doesn't last long in the heat here in the District of Columbia. This plant came through the winter in grand shape. The flavor is the best I've ever tasted. I'm beginning to think overwintering cilantro should be a permanent part of our garden plan.

Parsley is a biennial, meaning it goes to seed in the second year. Already it is taking on a woolly appearance. It won't matter how furiously you harvest it--this parsley is determined to replicate. It's almost better just to dig it up and plant some new seed.

Thursday, February 21, 2008

Kids Make Winter Salad with Honey-Mustard Vinaigrette

Making salad may seem like the simplest thing, but I thought it was a worthy subject for my "food appreciation" classes. When you think about it, there are some important skills and health considerations involved in the handling of tender greens.

All produce should be washed before eating. Even some of the kids in my classes had heard of instances of e. coli poisoning from salad. At home, I like to fill my kitchen sink with cold water and let my greens soak. I break head lettuces apart so that individual leaves all get a good wash. Agitate the greens with your hands. Any sand or grit will sink to the bottom. It's suprising what you find sometimes when you drain the sink.

For classroom purposes, I filled a big bowl of water and soaked our lettuces in that. Meanwhile, I had each of the kids peel a clementine and practice separating the fruit into individual sections and removing all the little white fibers from the fruit. Who wants to find a hairy piece of fruit in their salad? The idea is to show the kids in a hands-on way the importance of visual appeal in food, taking care to make things look good.

I've been introducing the kids slowly to working with kitchen knives. Some felt confident enough to slice radishes. It's important for them to learn how to create a safe, stable cutting environment. That means putting a cloth of some sort under the cutting board so that it doesn't slide around, and trimming certain vegetables so they aren't rolling across the cutting board. Cut a radish (or onion, for instance) in half first, so that it lays flat. Then it can be sliced safely.

Some kids were slicing. Others were peeling and grating carrots. We also cut a Belgian endive into rings. After soaking and cleaning watercress and two types of lettuce, the kids took turns tearing the lettuce into bite-size pieces and running the greens through a salad spinner. Kids love turning the spinner. Even more, they love it when you remove the top while the basket is spinning madly inside. A piece of lettuce goes flying and the class dissolves in a fit of laughter.

And just what is all that spinning about? Can you say centrifugal force? Here's where making salad turns into a science lesson.

There's also science in making a dressing. What happens when you mix oil and vinegar? Nothing much. The oil just sits on top of the vinegar. We have to create an emulsion, wherein the oil and vinegar are bound together. Mustard helps as a binder. We place a heaping teaspoon at the bottom of a large bowl, then add a teaspoon of honey. Add about 1/4 teaspoon salt, a generous pinch of ground pepper and 2 tablespoons of white wine vinegar.

Now this is the important part. Mix the mustard, honey, salt, pepper and vinegar with the whisk and add just a drop or two of extra-virgin olive oil. Whisk vigorously until the oil is completely distributed. This is the start of the emulsion. Now we whisk in several more tablespoons of olive oil. For a mellow vinaigrette, the proportions usually are three parts olive oil to one part vinegar.

We pass the bowl around the class so that everyone can experience the whisking and see the vinaigrette thicken. Before long, we have a lovely dressing with just the right balance of sweet and sour. The finished salad is practically a work of art, with all the different colors and shapes and flavors. Suddenly, silence: The kids are all busy eating.

Thursday, November 29, 2007

Dark Days: Meal 6

Turkey left over from the 31-pound Thanksgiving bird we butchered at our friend Mike Klein's farm in nearby Prince George's County. Here some dark meat is piled on a thick slice of yeasted sweet-potato bread (using sweet potatoes from our CSA package), smeared with mayo and gingered cranberry relish. Everything is then smothered with giblet gravy. In the background is a simple salad composed of the many lettuce varieties, arugula, mizuna and baby mustard greens we have growing in the garden.


The sweet potato bread is from Bill Neal's classic Biscuits, Spoonbread, and Sweet Potato Pie.

To make two loaves in standard loaf pans (9 x 5 x 3 inches):

2 pkg. dry yeast

1/2 cup warm water

1 cup milk

1/4 cup sugar

1 1/2 tsp salt

1/2 cup butter

1 1/2 cup mashed, cooked, cold sweet potatoes

1 tsp cinnamon

1/2 tsp freshly grated nutmeg

4 1/2 cups all-purpose flour

1 cup rolled, uncooked oats

Dissolve dry yeast in warm water.

Heat milk with sugar and salt, stirring until dissolved. Remove from heat and let cool to room temperature.

Cream butter and sweet potatoes well. Add dissolved yeast, milk mixture and then all dry ingredients. Beat very well, then turn out onto a floured surface. Knead vigorously until satiny, about 10 minutes.

Place dough in a bowl, cover and let rise in a warm place until doubled, about 1 hour. Punch down and divide into two portions. Roll into loaf shapes and place in greased loaf pans. Cover and allow to rise about 1 hour or until doubled.

Before baking, glaze the loaves with 1 egg beaten with 2 tablespoons milk. Place loaves in a 400-degree oven and bake 45 minutes. They should emerge a deep honey color.

Note: These loaves can also be braided before placing in the loaf pans.

Monday, October 8, 2007

Composed Salad from the Garden

Quick! Inlaws are in town and coming to lunch. What do you do?


Well, I wanted to show off the garden, of course, so a salad leaped to mind. The advantage to that is, hardly any cooking at all. And since I was in the middle of making client meals, less additional cooking turns out to be a big plus indeed.


We planted a rather large bed of potatoes this year. That was the first place I checked. A potato bed is like having a secret bank account. It will sit there patiently while you eat other things. Then when the occasion arrives, you simply start poking around with your forked spade to see what turns up. In this case, a few turns of the spade revealed some long, narrow purple potatoes as well as a variety of reds. I swear, I really have no idea what's hiding in that soil. The potato sets all came from our farmer friend Mike and I never made a note of what variety they were. But it sure is nice to have them when you want them.

Most of our tomato plants are fading, but there are still some big, juicy fruits on the vine. I would definitely cut some of those into wedges for the salad. We also had a few pasture-raised eggs in the fridge. Hard boil those. But the salad needed something more. We made a little trip to the new farmers market down the street. It's a lovely thing to have a farmers market just a few blocks away and there I saw the biggest, most outstanding heads of broccoli I've even encoutered. Bigger than life, really. I had no idea they could grow to that size. Also some extremely lovely and fresh green beans from the same farm. They were just the thing...


A big pot of salted water will satisfy most of the cooking needs for a composed salad. Green beans, broccoli, potatoes--all were cooked just to doneness, then chilled in a bowl of cold water. We have several varities of lettuce in their prime now. I planted them for fall, but it's been so hot here I'm just hoping they don't bolt. We're experiencing an August in October.

My wife, the food artist, arranged the vegetables on a big, green, decorative platter, then filled a squirt bottle with a light mustard vinaigrette. We would present the platter at the table and let the guests serve themselves.

For the occasion, brother-in-law Tom, the oenophile, brought a lovely bottle of Washington State late-harvest Reisling. Tom was smitten with the freshness of the tomatoes. They don't get any better. Midway through lunch, he had to run back to the kitchen and slice some more.

Catching up with family should always be like this, lingering over a fresh garden salad and sipping a delicious wine...

Saturday, August 25, 2007

Foraged Salad for Breakfast

You never know what delights you might come across messing in the garden.

Today is supposed to be one of the hottest of the summer so I was out early weeding. The bed where I have been growing beets was mostly overrun with crabgrass. And I should say I've been completely derelict about harvesting those beets, but that's another story coming up soon.

I want to get this bed ready for planting salad and other greens for the fall. So it was time to do a little digging with the forked spade and get down on all fours to get my hands dirty. The spade sinks easily into the soil. We've had a fair amount of rain lately, which makes weeding all the more easy. I grab clumps of grass and they come up with great root balls. Shake them vigorously and knock them against the ground to remove all that rich soil and save it for the garden.

In the process, I uncovered a lovely bunch of arugula--a complete surprise, since the arugula I planted in the spring bolted back in May. I hate to be without arugula in the garden, so this was a great find. I set it aside. Then, not too much later, I pulled up a handful of perfectly happy mizzuna, hidden in the grasses. Only my love for arugula surpasses my feelings for mizzuna. Its peppery bite is a flavorful addition to salads, so I set that aside as well.

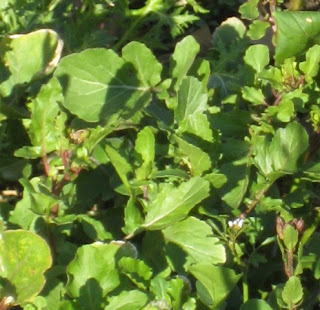
Plunge spade, grab weeds, throw weeds in bucket for compost pile--I was moving right along. Then I noticed one, then two, then three clumps of purslane. Purslane is a succulent with redish stems and clusters of small round leaves. It grows like a weed around the garden or sometimes out of cracks in the sidewalk. It is edible, and just recently I learned that purslane is the number one source of Omega-3 fatty acids among green leafy vegetables, those being the same heart-healthy Omega-3s that are so sought after in fatty fish such as salmon.


Personally, I think purslane is an acquired taste. The flavor is mild and somewhat citrusy, but the texture can be mucilaginous and off-putting. I can't stomach it cooked (give me okra any day). But I was confident it would blend nicely in a salad with the stronger tasting arugula and mizzuna, and then I'd have the benefit of all those fatty acids, as well as the many vitamins purslane confers: A, C and E, plus potassium, calcium and iron.

By the time I'd finished weeding, I thought I had the beginnings of breakfast. A nice plump carrot had offered itself during my digging. I cleaned that and ran it through the mandoline for julienne. I also had some yellow cherry tomatoes picked a couple of days ago, a few cooked green beans stashed in the fridge, and part of a loaf of rustic bread that I turned into cubes.

So here was the finished salad, foraged fresh from the garden: arugula and mizzuna leaves, purslane, julienned carrots, cherry tomatoes, green beans, rustic bread. Drizzle with extra-virgin olive oil, lemon juice and a bit of rice vinegar. Season with course salt and freshly ground black pepper. Some goat cheese or grated parmesan would work nicely as well.

Friday, May 25, 2007

Will Kids Eat Salad?

Looking for inspiration for the "food appreciation" classes I teach at a private elementary school here in the District of Columbia, I need have searched no farther than my own front yard.

There I have 15 different varieties of lettuce at the peak of Spring growth. All different colors. All different shapes.

But I was plagued with some doubts. Would the kids, who range in age from 4 to 13, eat my salad?

Naturally, there had to be more to this lesson that just throwing a bunch of lettuce in a bowl. I incorporated a quiz (we've been rehearsing for several weeks) about what, exactly constitutes a spring vegetable that might also be a candidate for our salad.

In other words, what would you put in your salad?

Tomatoes were a popular choice. We had to fudge a little on tomatoes, since they really aren't in season until at least July.

Cucumbers!

Nope, I said. Not till summer.

Corn!

Nope, not till summer.

Pumpkin!

Pumpkin?

Carrots!

Now that's more like it.

So what I brought to put in the salad were, in addition to four different kinds of lettuce in a variety of colors, and the aforementioned carrots, were:

Radishes
Celery
Fennel
Endive
Vidalia onion
Red cabbage
Cherry tomatoes
Goat cheese

The skill sets we'd be working on were not entirely new, but excellent to practice: peeling, grating, slicing.

Classes were divided into teams. Vegetable washing, peeling, grating and slicing commenced.

I'm happy to say that all of the kids in my classes are by now fairly comfortable with knives and graters, although the younger ones still need to be watched. Turns out they do an excellent job with a little guidance. Consistency of slicing still needs some work.

After all the vegetables were prepped, the kids took turns tossing them in a large bowl. Then on to something entirely new for them, a classic vinaigrette.

Nothing fancy. This is a lesson, after all, not a competition. Just a dollop of mustard, juice from half an orange, a squirt of white wine vinegar (But I don't drink wine! one of the boys lamented), a little salt, pepper, some sugar. Then for the really important part--incorporating the extra-virgin olive oil.

I explained what an emulsion is, how oil doesn't like to mix with water (or vinegar), how you have to start with just a tiny drizzle of olive oil and beat it really well until the liquid starts to shine. The mustard helps bind everything together. Once that's done, you can add lots more olive oil and continue beating really well until what you have in the bowl thickens and looks like salad dressing.

Everyone got a plastic spoon, tasted, and made suggestions for adjusting the seasonings.

Too much salt!

More sugar!

More mustard!

I don't like mustard!

Ewwww! What's goat cheese?

I was so pleased at how the kids then proceeded to gobble up their salad (only one 5-yeaer-old boy declined) that I decided to try this on my daughter at home. Surely she would gobble up her salad as well, right?

Well, she leaped at the chance to grate carrots and cut radishes. She buzzed right through the Vidalia onion. She was a little frustrated by the red cabbage (This is too hard for me...). Then, as I started to make the dressing, she began to complain.

"I don't like tomatoes!" she whined. "I don't like onion! I don't like mustard! I want pasta!"

It was the usual dinnertime struggle. And no amount of me saying how much the kids at school liked the very same salad made an ounce of difference. We were back to the same old argument.

"No dessert if you don't eat salad!"

We sound just like our own parents...

So I admire Charlotte at the Great Big Vegetable Challenge blog even more for tackling this kids vs. vegetables thing. What I'm thinking, though, is that it may not be so much the vegetables as the parent-child dynamic.

The kids at school eat their vegetables with hardly any complaints. There, I'm just the teacher. But as soon as it comes to our own daughter, the fighting starts. At home I'm The Dad, The Foil, The Adversary...

I'm starting to think it's more about a 7-year-old trying to establish her own territory than it is about food. Vegetables are not so much a food substance to be negotiated over as a trigger for the inevitable, generational power struggle.

What do you think?

Friday, April 6, 2007

Mache Rescue

On my tour of the garden this afternoon I finally resigned myself to the demise of my little bed of mache. It had survived the winter, but it was being overtaken by the dratted chickweed.

I fetched my stirrup hoe and started digging. But lo and behold! It was like Moses parting the Red Sea. The mache went right, the chickweed went left. Soon I was on my knees, shaking out the clumps of perfectly formed mache and filling a big bowl with it.

I'm seeing the makings of a nice salad for Easter.

Oh, ye of little faith...

Sunday, April 1, 2007

Bolting Arugula & Tat Soi: A Crazy Salad

Sometimes the garden doesn't give you much choice for dinner. There are some things that just have to be eaten now.


So it is with the greens that overwintered from last fall's plantings. The tat soi and the arugula are both flowering, getting ready to seed. These bolting plants need to be cut and eaten before the seed-setting process turns them bitter.


I don't mind being pressed into a crazy, bolting salad. In fact, I love the sharp, peppery flavor of the arugula. The tat soi is much milder, like broccoli. Just cut the plants at the base and strip the leaves off the stems. Keep the flowers and buds: they look great in a salad and they're all edible.


You could mix these with other salad greens, slice some mushrooms, maybe some hothouse cherry tomatoes, red onion. I like to add sectioned oranges for a bit of sweetness and visual interest and shaved Parmesan cheese for depth and that wonderful parmesan mouth feel.

You can dress the salad with your favorite vinaigrette. For me, a squeeze of lemon juice, some quality extra-virgin olive oil, salt and pepper, is perfectly sufficient.


Simple. Delicious. Fresh.


And right from the garden.

Sunday, March 25, 2007

Truffle Oil

When I appeared before the Garden Club of Annapolis last week the misstress of ceremonies by way of introduction ticked off some of the bullet points in my bio: Former newspaper reporter, caterer, personal chef, gardener, teacher.
“And what does that mean, exactly, ‘The Slow Cook,’?” she asked when she got to the moniker I use for this blog. “Is that something you do on a grill?”

"No,” I replied. “That’s more like the weekend we spent recently on our friend’s farm, killing a bunch of pigs and making sausage out of them.”

There were audible gasps.

Well, not everything I do involved killing a pig or cooking all day. Sometimes it just involves rich, wonderful flavors and impeccable ingredients. Into that category would fall truffle oil. I don't use truffle oil often, but I do keep a small bottle in my fridge for special occasions. Truffle oil is probably the closest I will ever get to using real truffles in my cooking. Just a few drops impart a truckload of flavor and can bind unlikely combinations of ingredients into something sublime. Example: this raw salad of shaved fennel and portobello mushrooms.
For Four Persons

1 medium fennel bulb

2 portobello mushrooms, cleaned (use a teaspoon or grapefruit spoon to remove the gills)

extra virgin olive oil

generous squeeze of lemon juice

truffle oil

salt to taste

Slice the fennel bulb and mushroom very thinly. (I cut the portobello caps in half first). It helps to use a mandoline or other vegetable slicer. Toss together in a bowl. Mix in some olive oil until the salad is just moist and glistening. Season with lemon juice. Add a drizzle of truffle oil, or just enough that the salad is frangrant with the oil. Season with salt and serve.